Success and Fail Modal in React
After the createSubscription API serverless function is executed, the page is redirected to the course page as shown in the below roadmap.
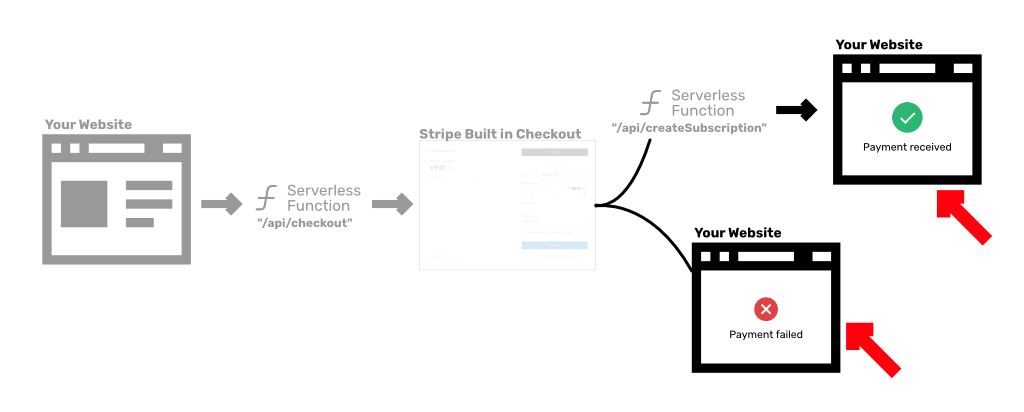
On the course page, we need to notify the user by sending an email with the login details. For that, we can render the success Modal.
For the success Modal, we can create the file at the below location:
/src/components/singleProduct/state/success.js
In the success.js, we can write the code as below:
import React from "react"
import { Link } from "gatsby"
const Success = ({ url }) => {
return (
<>
<div className="flex items-center justify-center w-12 h-12 mx-auto bg-green-100 rounded-full">
<svg
className="w-6 h-6 text-green-600"
x-description="Heroicon name: outline/check"
xmlns="http://www.w3.org/2000/svg"
fill="none"
viewBox="0 0 24 24"
stroke="currentColor"
aria-hidden="true"
>
<path
stroke-linecap="round"
stroke-linejoin="round"
stroke-width="2"
d="M5 13l4 4L19 7"
></path>
</svg>
</div>
<div className="mt-3 text-center sm:mt-5">
<h3
className="text-lg font-medium leading-6 text-gray-900"
id="modal-title"
>
Payment successful
</h3>
<div className="mt-2">
<p className="text-sm text-gray-500">
Thanks!!! Your payment is received. Please check your email and
click the below button to navigate to the login page.
</p>
</div>
</div>
<div className="mt-5 sm:mt-6">
<button
type="button"
className="inline-flex justify-center w-full px-4 py-2 text-base font-medium text-white bg-indigo-600 border border-transparent rounded-md shadow-sm hover:bg-indigo-700 focus:outline-none focus:ring-2 focus:ring-offset-2 focus:ring-indigo-500 sm:text-sm"
>
<Link to={"/login"}>Proceed to login »</Link>
</button>
</div>
</>
)
}
export default SuccessTo incorporate the success modal in the course page, we can update the singleProduct.js code as below.
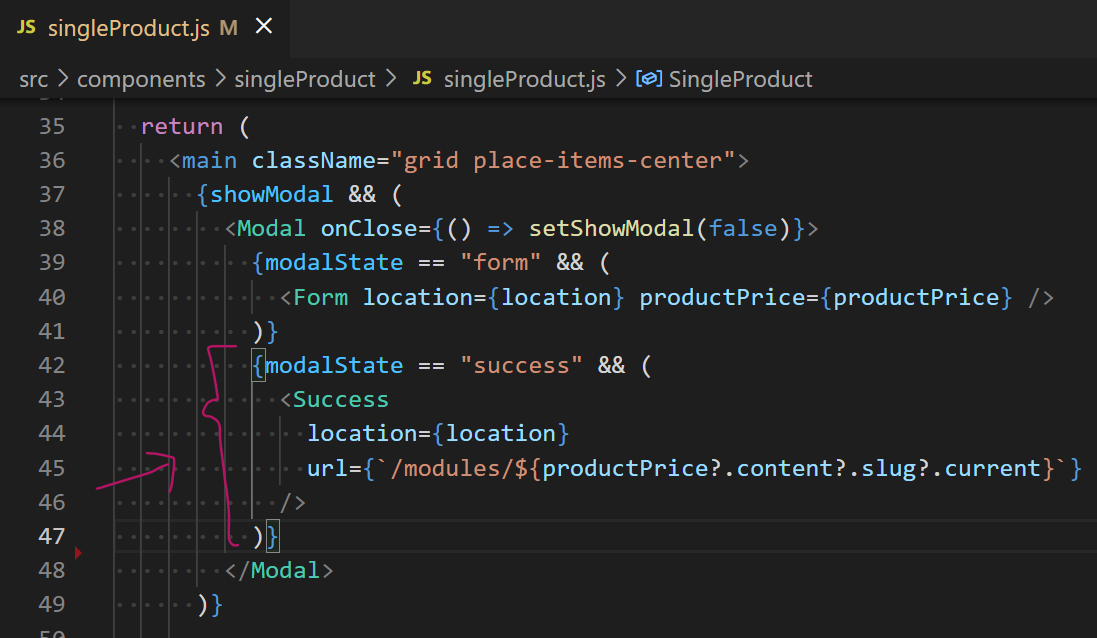
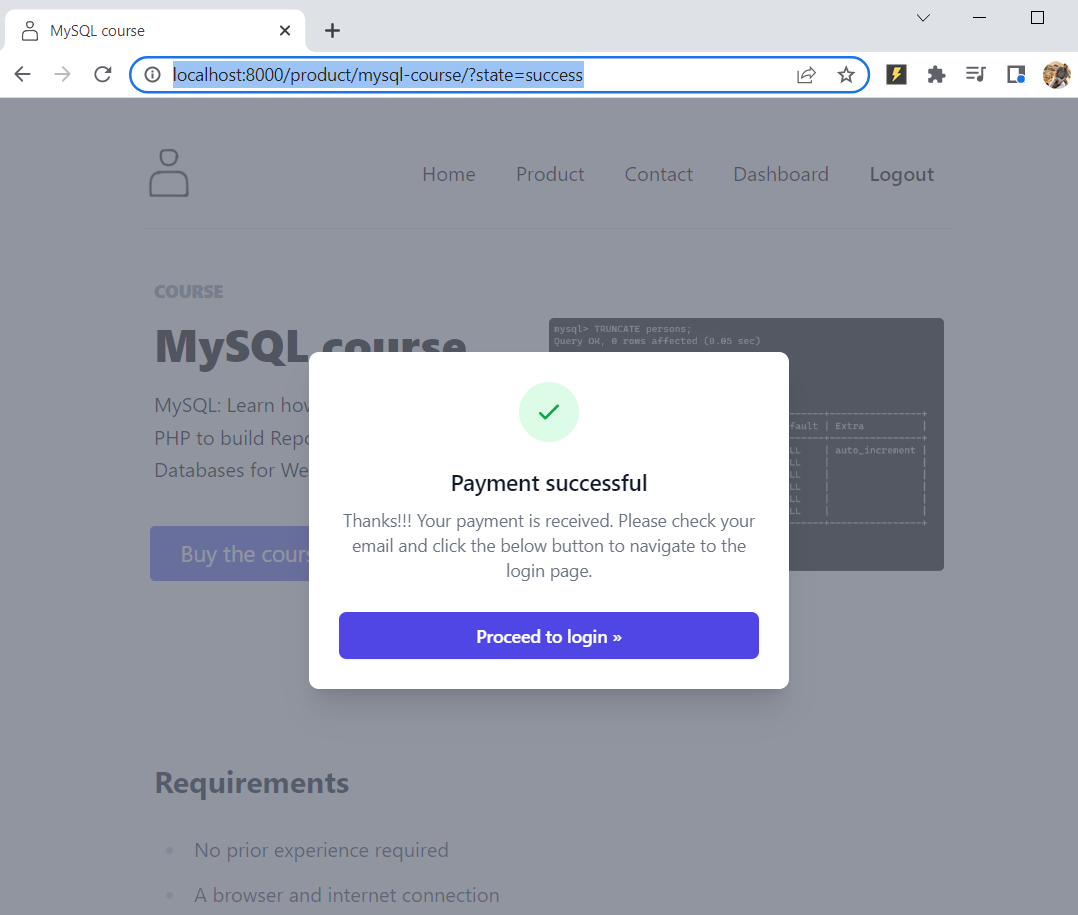
To render the success Modal, we can visit the below URL:
http://localhost:8000/product/mysql-course/?state=success
In the above URL, the below page is rendered:
Now, For the fail Modal, we can create the file at the below location:
/src/components/singleProduct/state/fail.js
In the fail.js, we can paste the code as below
import React from "react"

const Fail = () => {
  return (
    <>
      {/* sm:mx-0 sm:h-10 sm:w-10 */}
      <div class="mx-auto flex-shrink-0 flex items-center justify-center h-12 w-12 rounded-full bg-red-100">
        <svg
          class="h-6 w-6 text-red-600"
          xmlns="http://www.w3.org/2000/svg"
          fill="none"
          viewBox="0 0 24 24"
          stroke="currentColor"
          aria-hidden="true"
        >
          <path
            stroke-linecap="round"
            stroke-linejoin="round"
            stroke-width="2"
            d="M12 9v2m0 4h.01m-6.938 4h13.856c1.54 0 2.502-1.667 1.732-3L13.732 4c-.77-1.333-2.694-1.333-3.464 0L3.34 16c-.77 1.333.192 3 1.732 3z"
          ></path>
        </svg>
      </div>
      <div className="mt-3 text-center sm:mt-5">
        <h3
          className="text-lg font-medium leading-6 text-gray-900"
          id="modal-title"
        >
          Payment Failed
        </h3>
        <div className="mt-2">
          <p className="text-sm text-gray-500">
            Lorem ipsum dolor sit amet consectetur adipisicing elit. Consequatur
            amet labore.
          </p>
        </div>
      </div>
    </>
  )
}

export default Fail
To incorporate the fail modal in the course page, we can update the singleProduct.js code as below.
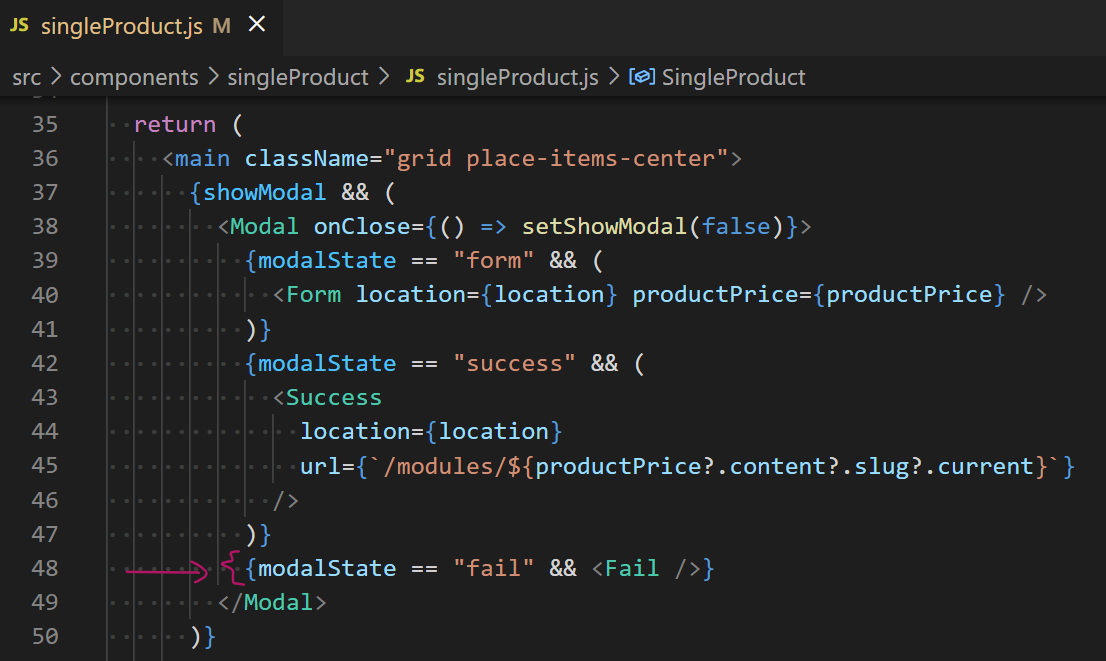
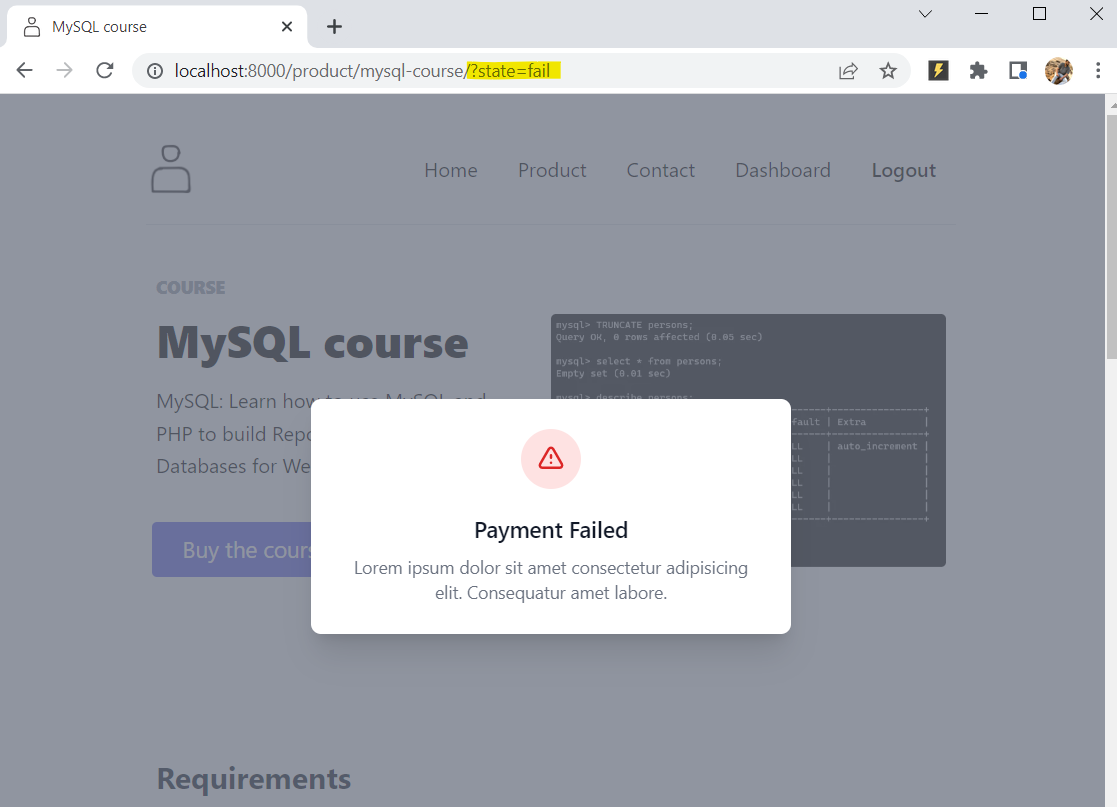
To render the fail Modal, we can visit the below URL:
http://localhost:8000/product/mysql-course/?state=fail
In the above URL, the below page is rendered:
Now, Let's test the the check how it works.