Create Content document in Sanity Studio
In this section, we'll create a content document in the Sanity Studio and define the schema for it.
The sanity_io supports 17 schema types e.g. Array, Block, Slug, etc. You can read more about the sanity schema type on the sanity schema page.
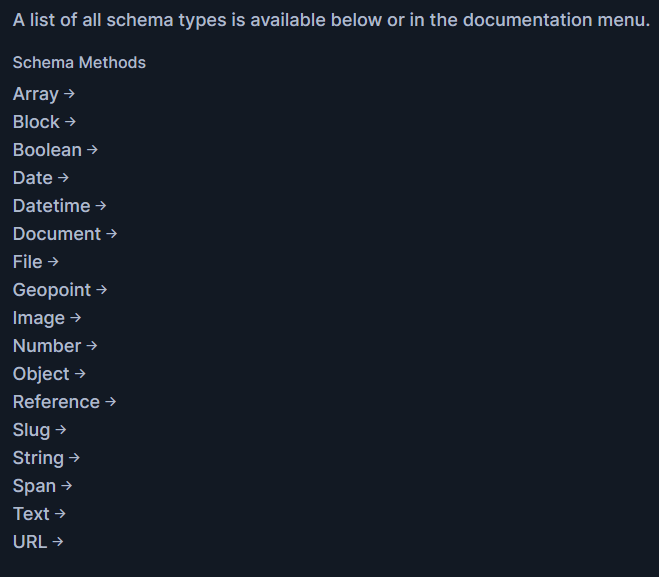
We can use the above schema types in the Sanity documents to model our data in the Sanity Studio.
Get Started
To get started, we need to create the schema of the Content document. In the content document, we need to define the following schema as below:
title, slug, image, block, file
For the Content document, we can create the file at the below location.
schemas/documents/content.jsx
📁 studio
└──	📁 schemas
		└── 📁 documents
				└── 📝 content.jsx
In the content.js, we can write the code as below:
export default {
  name: "content",
  title: "Content",
  type: "document",
  fields: [
    {
      name: 'title',
      type: 'string',
      title: 'Title'
    },
    {
      name: "slug",
      title: "Slug",
      type: "slug",
      options: {
        source: "title",
        maxLength: 96,
      },
    },
    {
      name: "image",
      title: "Image",
      type: "image",
    },
    {
      name: "exerpt",
      title: "Exerpt",
      type: "block",
    },

    {
      title: 'Documents',
      name: 'documents',
      type: "array",
      of: [
        {
          type: 'file'
        },
      ],
    }
  ],
};
In the Sanity Studio, we can navigate to the content document as below:
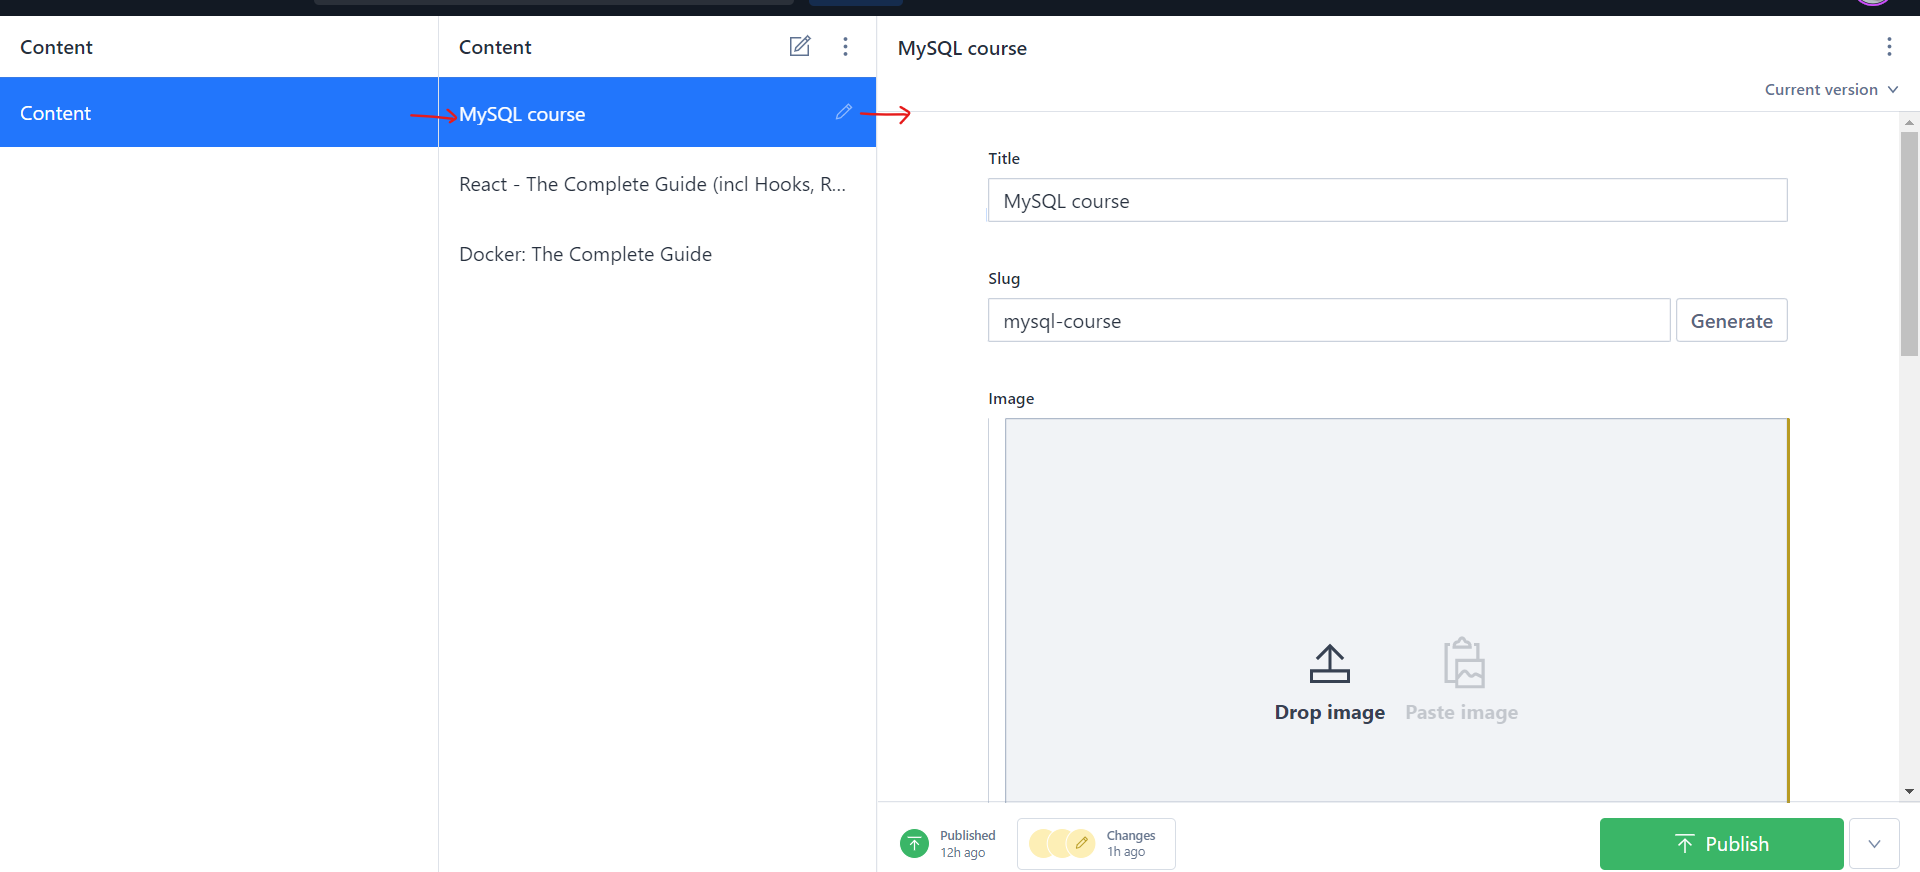
As shown in the above image, we've created three (3) entity for the content document.
The content document in Sanity Studio render as below:
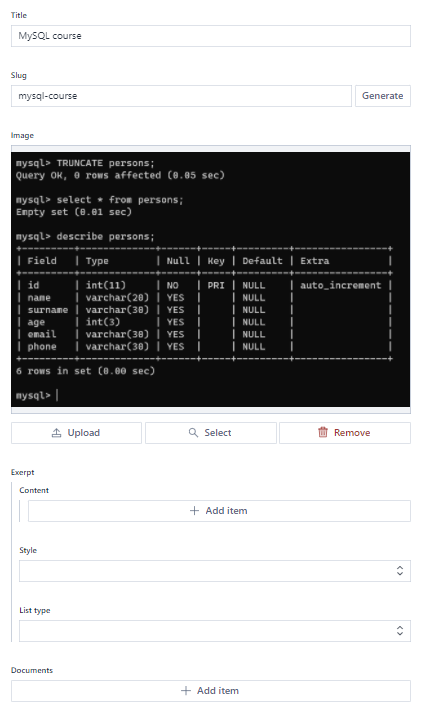
In the content document, we want to customize a few schemas in Sanity e.g. block editor, image, and file.
Firstly, we want to customize the block schema of the content document. We want the preview of the block editor to be like the WYSIWYG editor. In short, we want to customize the block schema in Sanity Studio as shown in the below image.
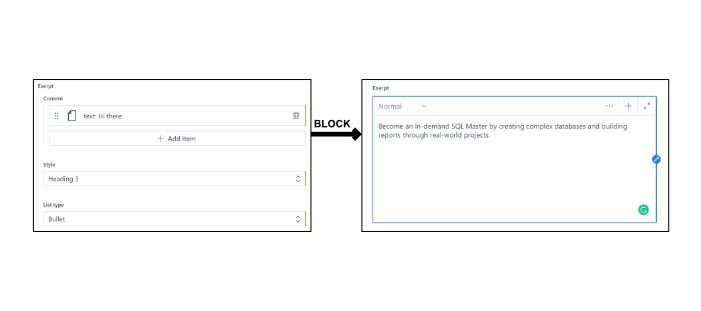
To customize the block editor, we can create a file at the below location:
/schemas/objects/bodyPortableText.js
In the bodyPortableText.js, we can write the code as below:
export default {
  name: "bodyPortableText",
  type: "array",
  title: "Post body",
  of: [
    {
      type: "block",
      title: "Block",
      // Styles let you set what your user can mark up blocks with. These
      // corrensponds with HTML tags, but you can set any title or value
      // you want and decide how you want to deal with it where you want to
      // use your content.
      styles: [
        { title: "Normal", value: "normal" },
        { title: "H1", value: "h1" },
        { title: "H2", value: "h2" },
        { title: "H3", value: "h3" },
        { title: "H4", value: "h4" },
        { title: "H5", value: "h5" },
        { title: "H6", value: "h6" },
        { title: "Quote", value: "blockquote" },
        { title: "Hidden", value: "blockComment" },
      ],
      lists: [
        { title: "Bullet", value: "bullet" },
        { title: "Number", value: "number" },
        { title: "Code", value: "code" },
      ],
      // Marks let you mark up inline text in the block editor.
      marks: {
        // Decorators usually describe a single property – e.g. a typographic
        // preference or highlighting by editors.
        decorators: [
          { title: "Strong", value: "strong" },
          { title: "Emphasis", value: "em" },
          { title: "Code", value: "code" },
        ],
        // Annotations can be any object structure – e.g. a link or a footnote.
        annotations: [
          {
            name: "link",
            type: "object",
            title: "URL",
            fields: [
              {
                title: "URL",
                name: "href",
                type: "url",
              },
            ],
          },
        ],
      },
    },
  ],
};
Above, we have created a custom schema in Sanity. As previously discuss, we have 17 schema types. Now, we have created one more schema, bodyPortableText.
To add the bodyPortableText schema type in Sanity, we can add the below lines of code in the schemas/schema.js.
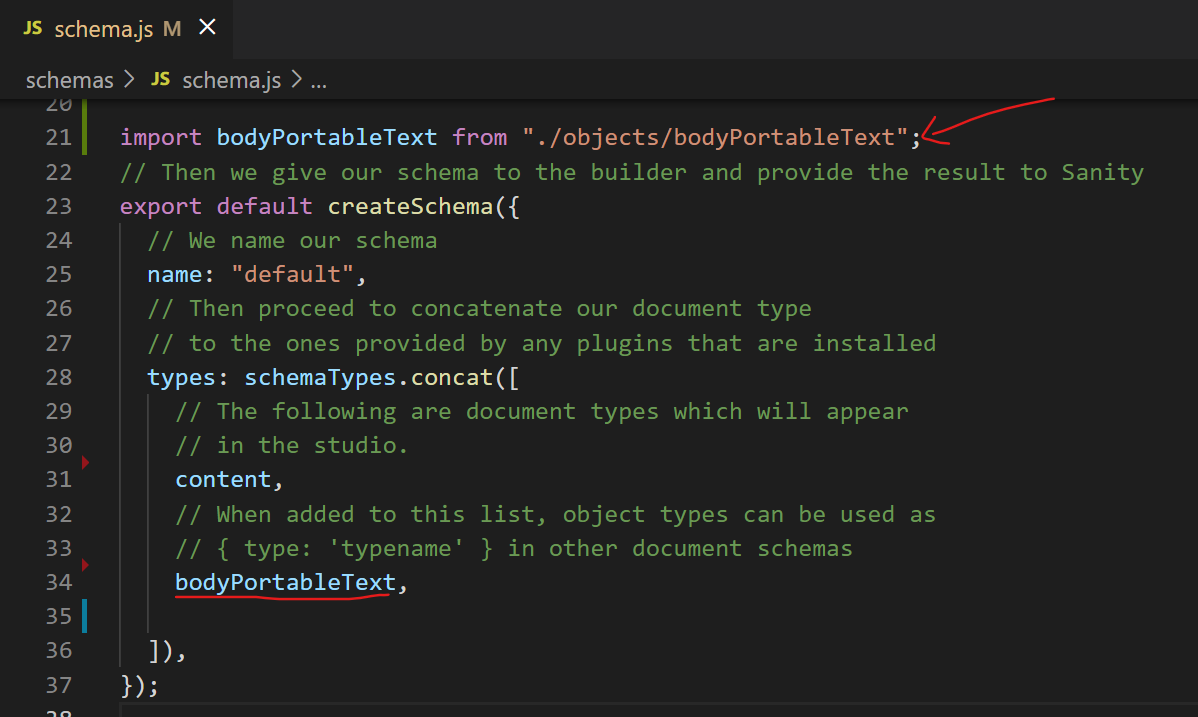
Also, we need to update the code in schemas/documents/content.js as shown below:
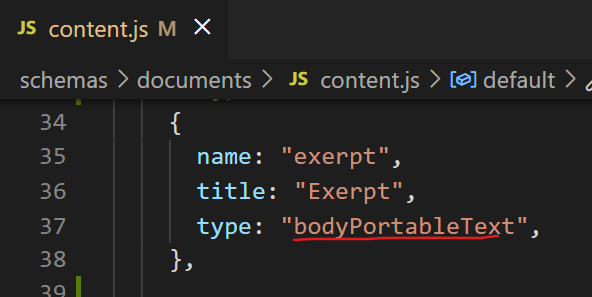
If we now visit the content document in Sanity, the page is rendered as below:

Next, In the content document, we want to customize the image schema in the content document as shown in the below image.
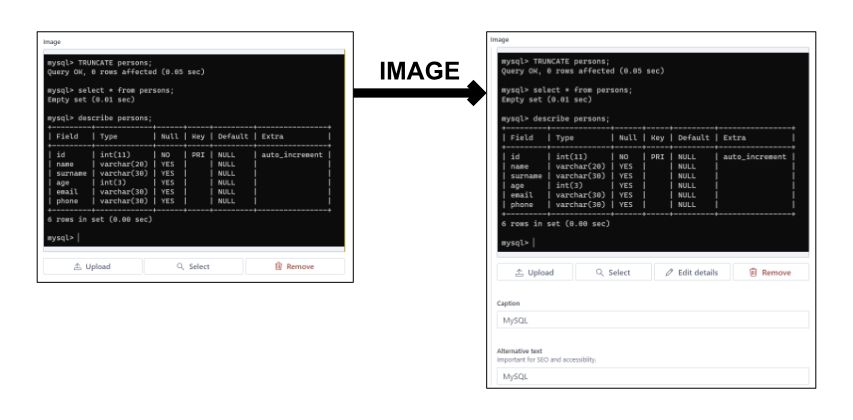
To define the custom image schema, we can create the file at the below location:
/schemas/objects/mainImage.js
In the mainImage.js, we can write the code as below.
export default {
  name: "mainImage",
  type: "image",
  title: "Image",
  options: {
    hotspot: true,
  },
  fields: [
    {
      name: "caption",
      type: "string",
      title: "Caption"
    },
    {
      name: "alt",
      type: "string",
      title: "Alternative text",
      description: "Important for SEO and accessiblity.",
      validation: (Rule) =>
        Rule.error("You have to fill out the alternative text.").required()
    },
  ],
  preview: {
    select: {
      imageUrl: "asset.url",
      title: "caption",
    },
  },
};
Above, we have to define the custom image schema (mainImage) but the mainImage schema is not recognized by the Sanity Studio. For that, we can update the code in the /schemas/schema.js as below:

In the /schemas/documents/content.js, we can update the code as below.

Now, the Sanity Studio render in the browser as below:

Lastly, we need to customize the file schema in Sanity Studio. For that, we can create the file at the below location.
schemas/objects/localfile.js
In the localfile.js, we can write the code as below:
export default {
  title: "File",
  name: "localfile",
  type: "file",
  fields: [
    {
      name: "description",
      type: "string",
      title: "Description",
    },
  ],
};
For the localfile schema, we can update the code in the /schemas/schema.js as below:
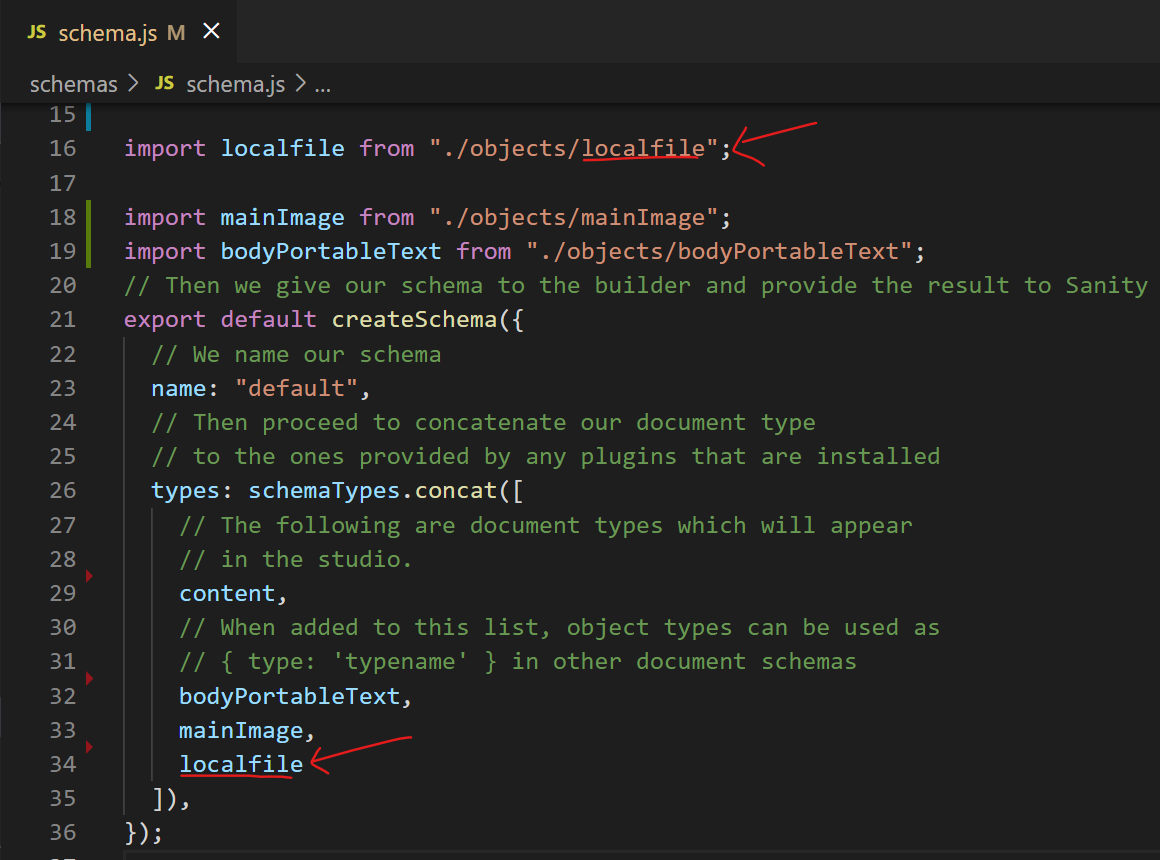
In the schemas/documents/content.js, we can update the code as below:

Finally, the content document in the Sanity Studio renders in the browser as below:

Preview in Sanity Documents
If we visit the Sanity Studio, we have not defined any preview for the documents list as shown below:

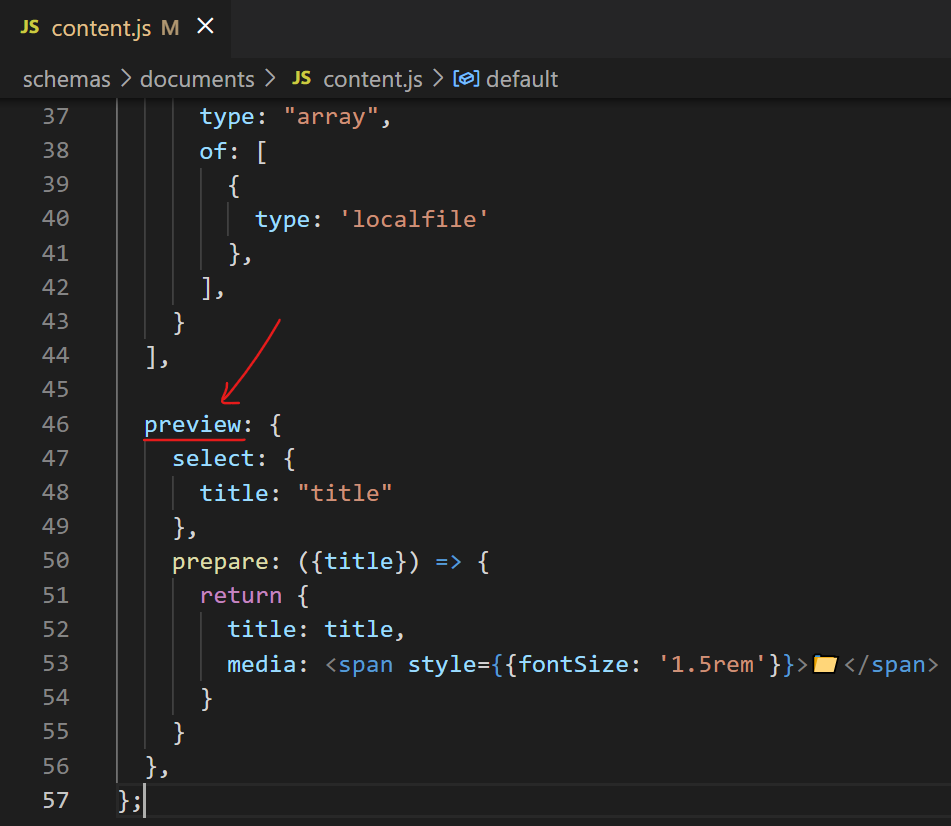
You need to import React package in the document file while working with the preview section.
import React from 'react'To define the preview section for the Sanity document, we can add the below lines of code in the content.js document.
import React from 'react'

export default {
  name: "content",
  title: "Content",
  type: "document",
  fields: [
  //  ..........
  ],

  preview: {
    select: {
      title: "title"
    },
    prepare: ({title}) => {
      return {
        title: title,
        media: <span style={{fontSize: '1.5rem'}}>📁</span>
      }
    }
  },
};
If now we visit the Sanity Studio, the preview icon is rendered as shown below:
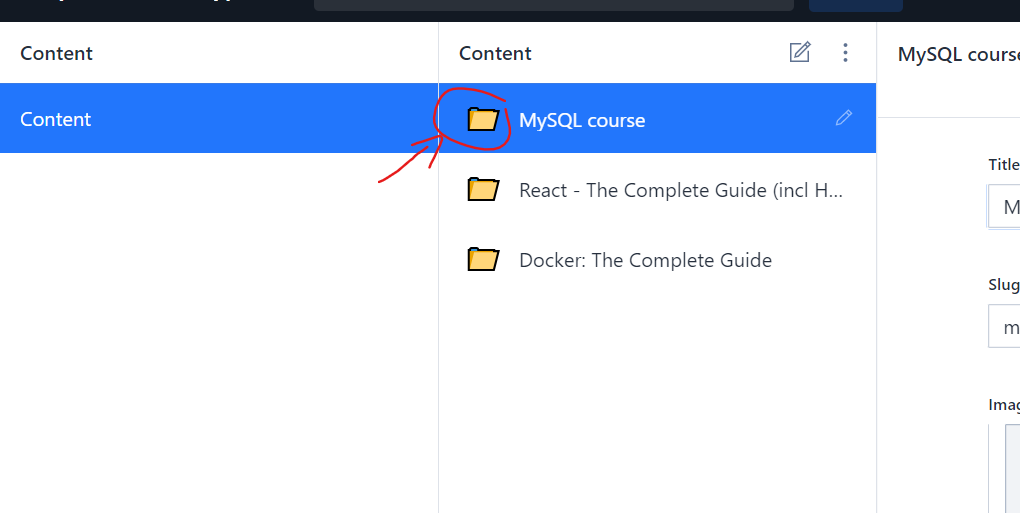
You can read more about Previews / List View here.
To add the custom icon for the Sanity document, we need to install the npm package react-icons by executing the below command in the terminal:
npm i react-iconsYou can search for more react icons on the below page.
In the content.js document, we can add the below line of code.

If we now visit the Sanity Studio, the icon of the document is shown in the below image.
