Render the Blog in Gatsby using Markdown
In this section, we'll use the markdown to render the blogs on the website. For that, we need to create the blog post in the filesystem as below.
/content
└── /blog
		└── /my-second-post
				├── index.md
				└──	image.jpg
In the above, we created the markdown file for blog post. We can create as many blog posts in the filesystem as we want. In the below, we create two (2) blog posts in the filesystem as below.
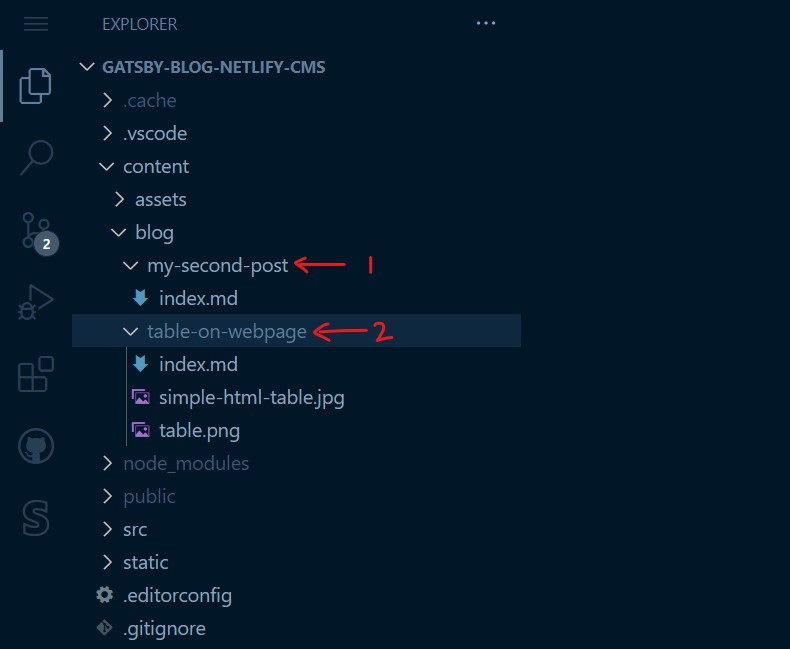
In the above folder hierarchy, we create a content/blog folder at the root of the project. The slug for the post is the folder name as in the below pattern:
/content/blog/<slug-name>/index.md
In the index.md file, we can write and structure the post content as below:
---

title: How to structure data in HTML table
description: We can use table to structure data in column and rows. Table is the HTML way to layout the data.
date: 2021-05-19T16:21:10.500Z
featuredimage: table.png
---


We can use tables to structure data in columns and rows. The table is the HTML way to layout the data. Here goes the body...
In the above markdown post, we can define the blog metadata as shown above e.g. title, description, etc. We can query the metadata of the markdown in the React component using GraphQL.
Source the blog post (filesystem data) in Gatsby
The markdown just exist on the filesystem of the project code. To render the markdown data in Gatsby, we need to source the data from the filesystem at build time. To source the data from the filesystem, we can install the npm plugin, gatsby-source-filesystem. For that, we can execute the below command in the terminal:
npm i gatsby-source-filesystemTo source the filesystem data in Gatsby, we can write the below code in the gatsby-config.js file:
module.exports = {

  plugins: [
    {
      resolve: `gatsby-source-filesystem`,
      options: {
        path: `${__dirname}/content/blog`,
        name: `blog`,
      },
    }
  ],
}
By specifying the filesystem source as above, we can now query the filesystem data using GraphQL.
After changing the gatsby-config.js, we can re-run the Gatsby dev server by executing the below command in the terminal:
npm run developAfter executing the above command, you can open the GraphQL IDE at the below URL:
http://localhost:8000/__graphql
In the GraphQL IDE, we can write the GraphQL query as below.
query {
  allMarkdownRemark(sort: { fields: [frontmatter___date], order: DESC }) {
    nodes {
      frontmatter {
        date(formatString: "MMMM DD, YYYY")
        title
        description
      }
    }
  }
}
The above query render in the IDE as below.
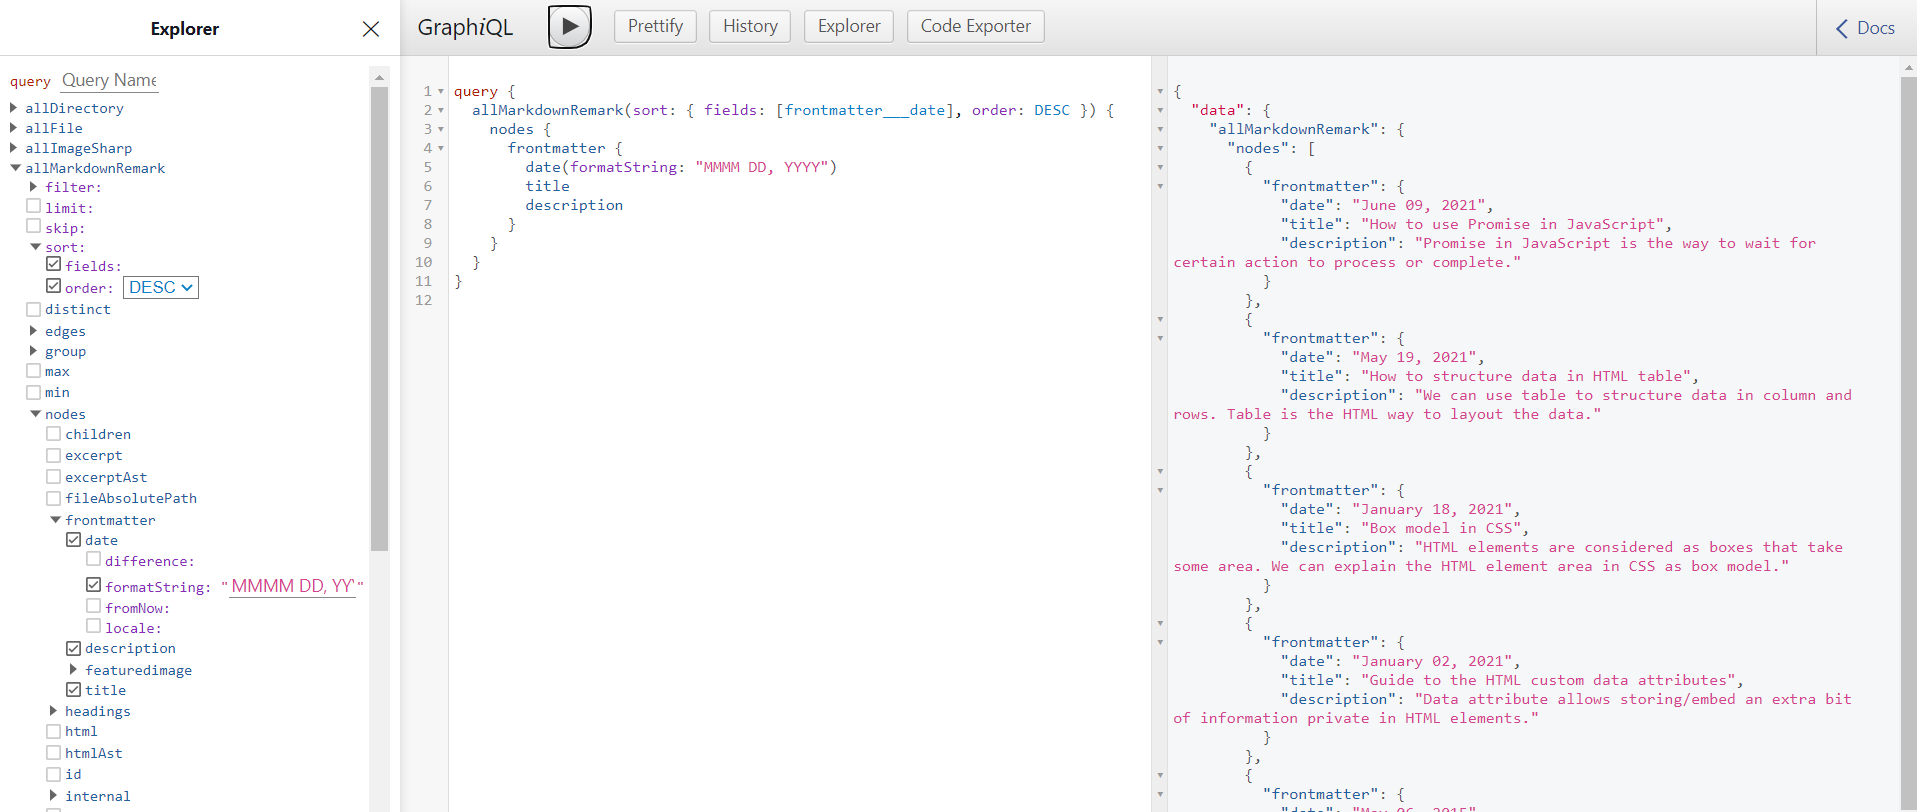
As shown in the above GraphQL query, we query the markdown data and mention what data we need in the query. But, we can not query the slug value because it does not exist in the markdown file. The slug of the blog post is actually the folder name. So we can rewrite the Graphql query as below.
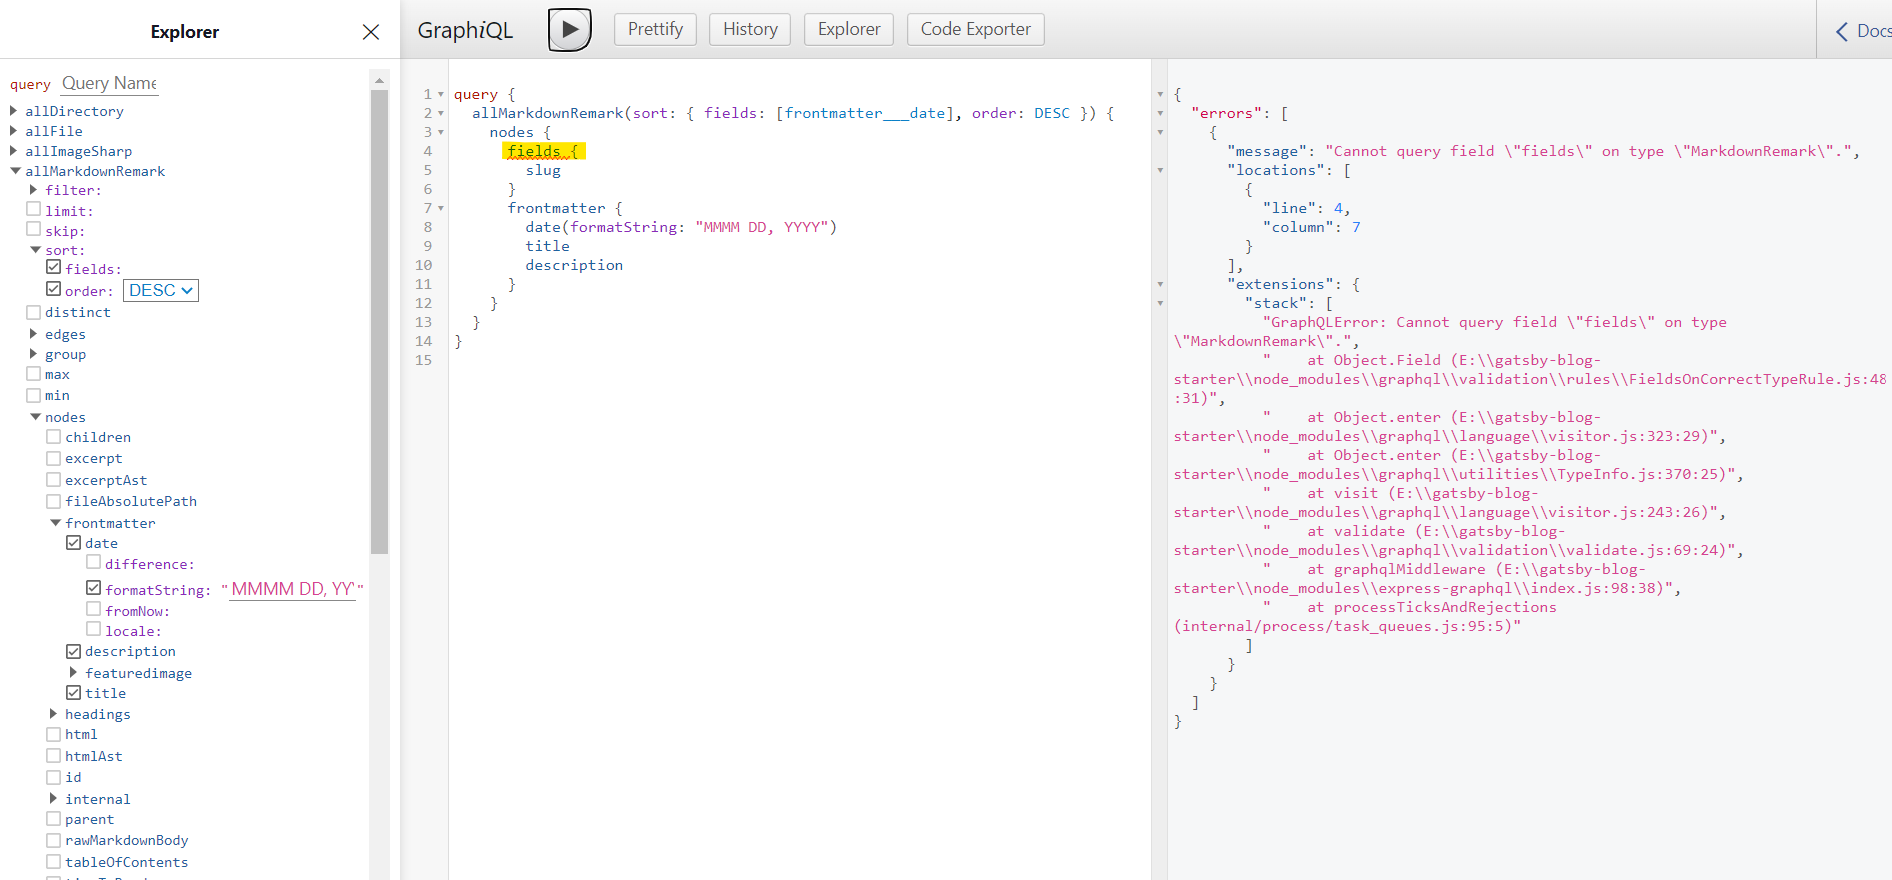
But the above Graphql query shows an error as highlighted above... In order to fix that, we can do an extra step.
To define the slug node field in the GraphQL, we can write the code below in the gatsby-node.js.
exports.onCreateNode = ({ node, actions, getNode }) => {
  const { createNodeField } = actions

  if (node.internal.type === `MarkdownRemark`) {
    const value = createFilePath({ node, getNode })

    createNodeField({
      name: `slug`,
      node,
      value,
    })
  }
}
In gatsby-node.js, we can export the onCreateNode function to extend or transform nodes when a new node is created. In our case, the filename of the folder servers is the slug variable.
Now we can re-write the GraphQL query as below:
query {
  allMarkdownRemark(sort: { fields: [frontmatter___date], order: DESC }) {
    nodes {
      fields {
        slug
      }
      frontmatter {
        date(formatString: "MMMM DD, YYYY")
        title
        description
      }
    }
  }
}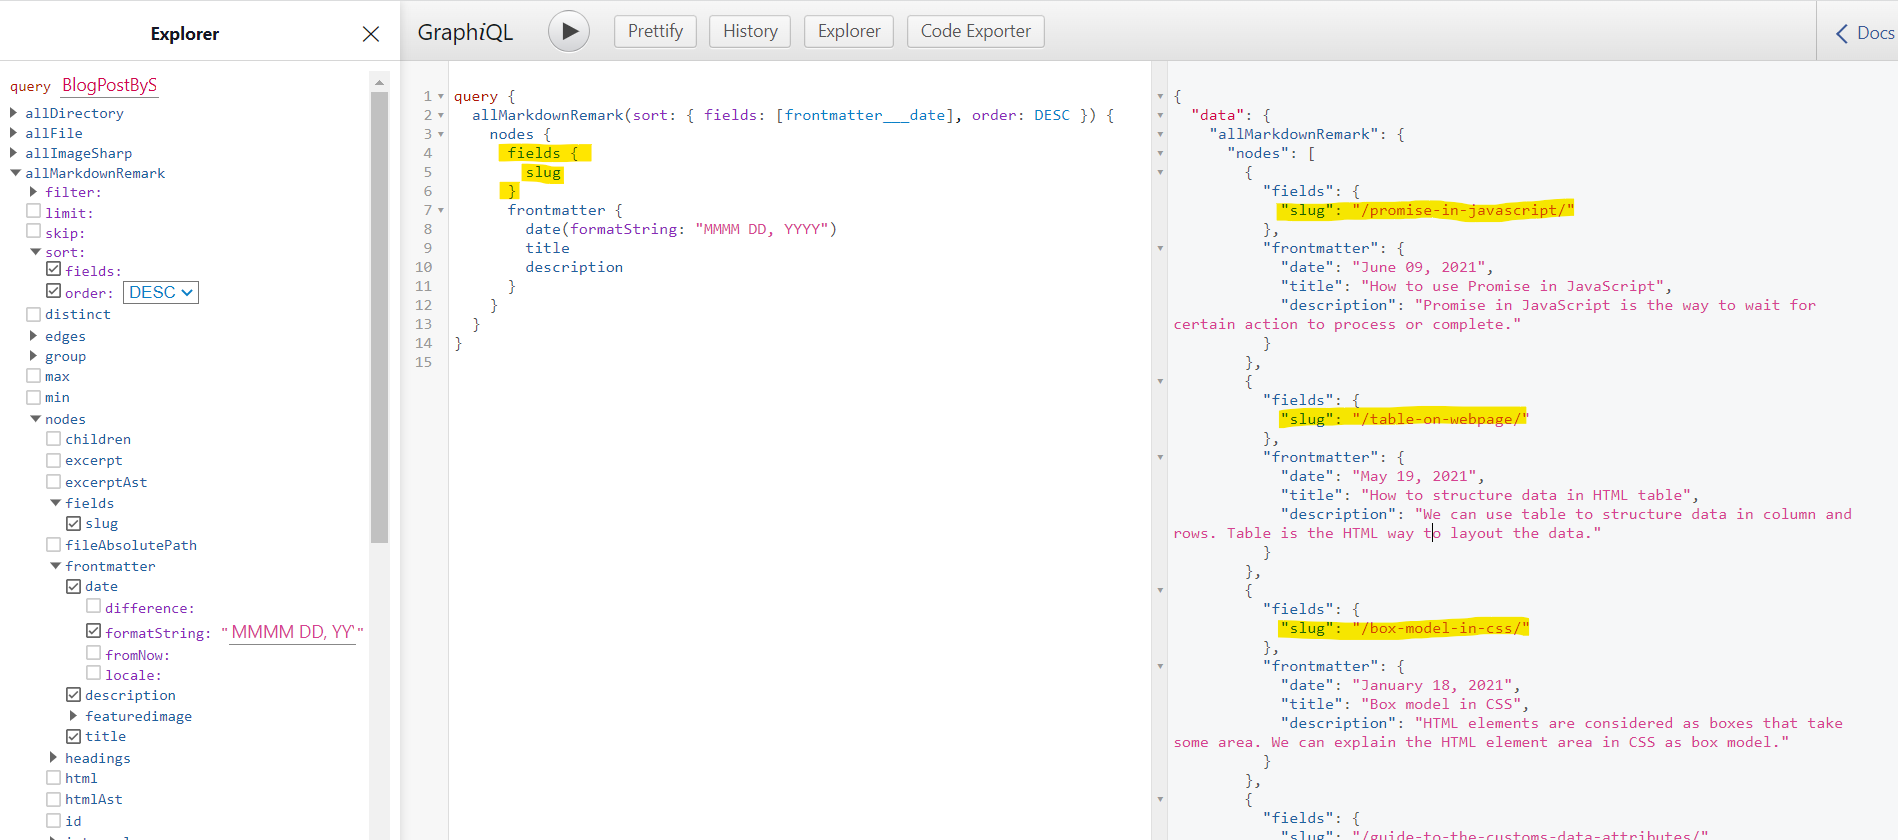
Great!!! We have got the expected results from GraphQL query 🎉.
Render the post content
On the Homepage, we can now render the list of the blog posts. We can run the GraphQL query to fetch the blog post data in the React component and style it using Tailwind.
In the /src/pages/index.js, we can paste the below code:
import React from "react"
import { graphql } from "gatsby"
import Layout from "@components/layout"
import Seo from "@components/seo"

import ArchiveBlog from "@components/archiveBlog"

const BlogIndex = ({ data, location }) => {

  return (
    <Layout location={location} title={siteTitle}>
      <Seo
        title="Homepage"
        location={location}
        description="The Homepage to show blog posts."
      />

      <ArchiveBlog />
    </Layout>
  )
}

export default BlogIndex
In the above code, we import the ArchiveBlog component. The /src/pages/index.js component is Page Component which creates the route in Gatsby while ArchiveBlog is the simple React component where we define the UI for the HomePage.

In the ArchiveBlog component, we can write the GraphQL query to fetch the blog post data.
For that, we can create a React component at the below location:
src/components/archiveBlog.js
In the archiveBlog.js, we can write the code as below
/**
 * Bio component that queries for data
 * with Gatsby's useStaticQuery component
 *
 * See: https://www.gatsbyjs.com/docs/use-static-query/
 */

import React from "react"
import { Link, useStaticQuery, graphql } from "gatsby"

const ArchiveBlog = () => {
  const {
    allMarkdownRemark: { nodes },
  } = useStaticQuery(graphql`
    query {
      allMarkdownRemark(sort: { fields: [frontmatter___date], order: DESC }) {
        nodes {
          fields {
            slug
          }
          frontmatter {
            date(formatString: "MMMM DD, YYYY")
            title
            description
          }
        }
      }
    }
  `)

  if (nodes.length === 0) {
    return (
      <div className="container max-w-2xl px-3 mx-auto">
        <h3 className="text-base font-normal text-gray-400">nothing Here :)</h3>
      </div>
    )
  }

  return (
    <div className="container max-w-2xl px-3 mx-auto">
      {JSON.stringify(nodes)}

    </div>
  )
}

export default ArchiveBlog
Now, if we visit Homepage, we can view the GraphQL data in JSON format as below
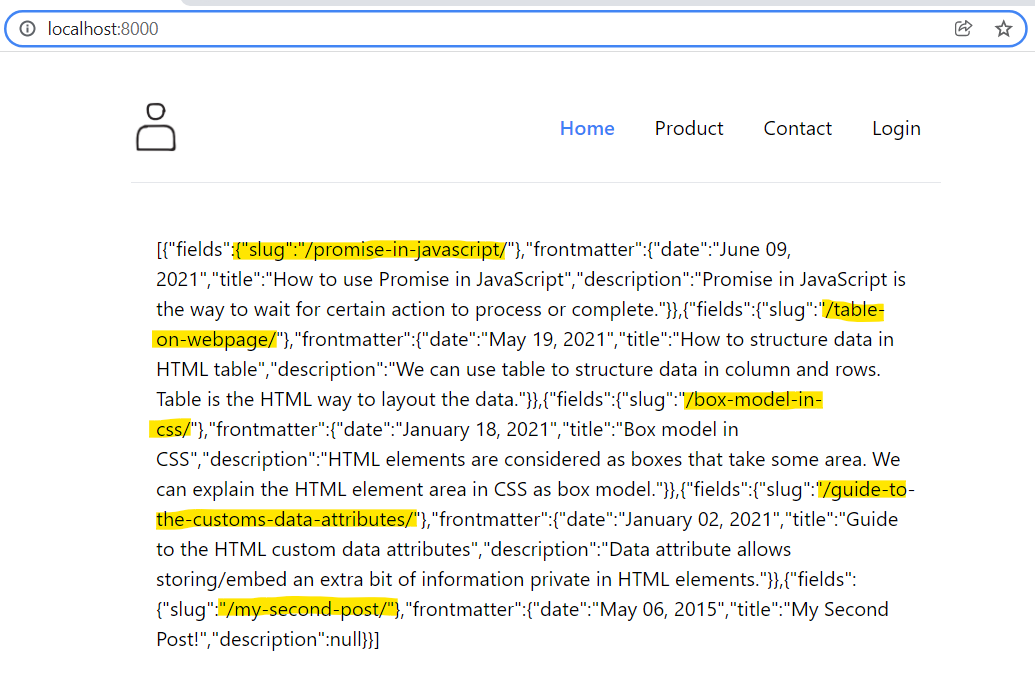
In the code, we use Static Query in Gatsby to fetch the data using GraphQL. To learn more about static Query, you can visit the page:
Now, we need to style the JSON data using Tailwind CSS. For that, we can write the code in archiveBlog.js as below.
/**
 * Bio component that queries for data
 * with Gatsby's useStaticQuery component
 *
 * See: https://www.gatsbyjs.com/docs/use-static-query/
 */

import React from "react"
import { Link, useStaticQuery, graphql } from "gatsby"

const ArchiveBlog = () => {
  const {
    allMarkdownRemark: { nodes },
  } = useStaticQuery(graphql`
    query {
      allMarkdownRemark(sort: { fields: [frontmatter___date], order: DESC }) {
        nodes {
          fields {
            slug
          }
          frontmatter {
            date(formatString: "MMMM DD, YYYY")
            title
            description
          }
        }
      }
    }
  `)

  if (nodes.length === 0) {
    return (
      <div className="container max-w-2xl px-3 mx-auto">
        <h3 className="text-base font-normal text-gray-400">nothing Here :)</h3>
      </div>
    )
  }

  return (
    <div className="container max-w-2xl px-3 mx-auto">
      <h1 className="mb-4 text-3xl font-extrabold leading-snug">
        Latest Posts
      </h1>
      <main>
        {nodes.map(blog => {
          return (
            <div className="py-4">
              <h2 class="text-gray-900 text-xl font-extrabold leading-snug">
                <Link to={blog.fields.slug} className="text-indigo-600">
                  {blog.frontmatter.title}
                </Link>
              </h2>

              {blog.frontmatter?.description && (
                <h3 className="text-base font-normal text-gray-700">
                  {blog.frontmatter?.description}
                </h3>
              )}

              <h3 className="py-1 text-xs italic font-light">
                {blog.frontmatter.date} by Taimoor Sattar
              </h3>
            </div>
          )
        })}
      </main>
    </div>
  )
}

export default ArchiveBlog
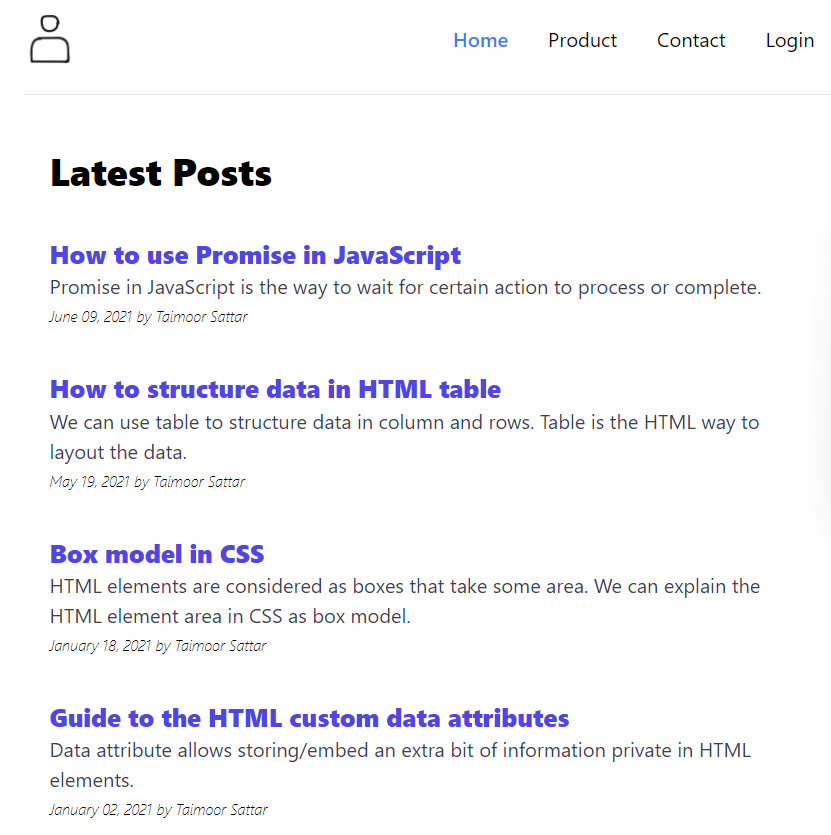
Now, If we visit the Homepage, the below page is rendered with the list of the blog post:
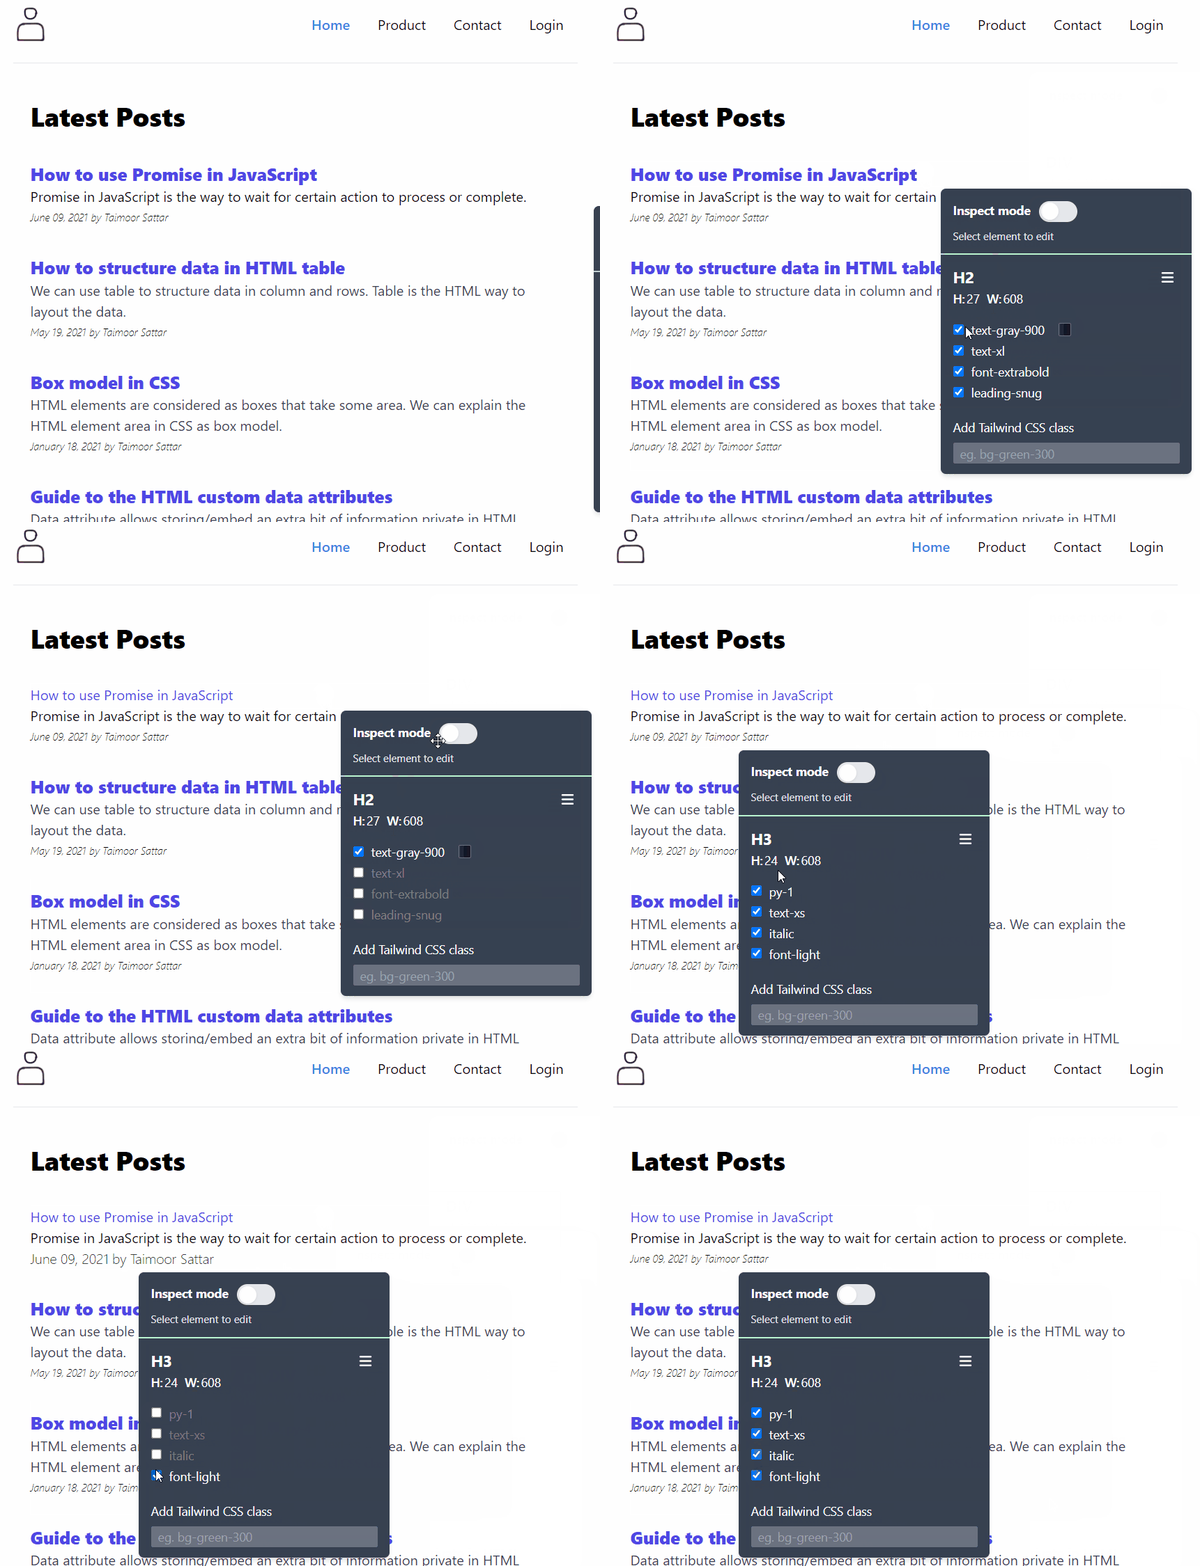
I use the inspect tool to explain to you how Tailwind CSS uses class names to style the HTML elements.
You can download the ArchiveBlog.js component file below:
That's it, we now render the list of the blog post. In the next section, we create the slug page for each blog post.