Create Payment Link in Stripe
The Stripe payment link is the quickest way to get started collecting payment from the user.
Before you start, make sure you are login into the Stripe Dashboard. To log in to the Stripe Dashboard, you can visit the below website:
To get started, we need to create a product Page in Stripe. For that, we can navigate to the below link in Stripe Dashboard.

To add the product in Stripe, enter the information of the product e.g. name, description, Price, etc. After that, click on the 'Save product' button

For the Price of the Product, we can either select one-time or Recurring payments.
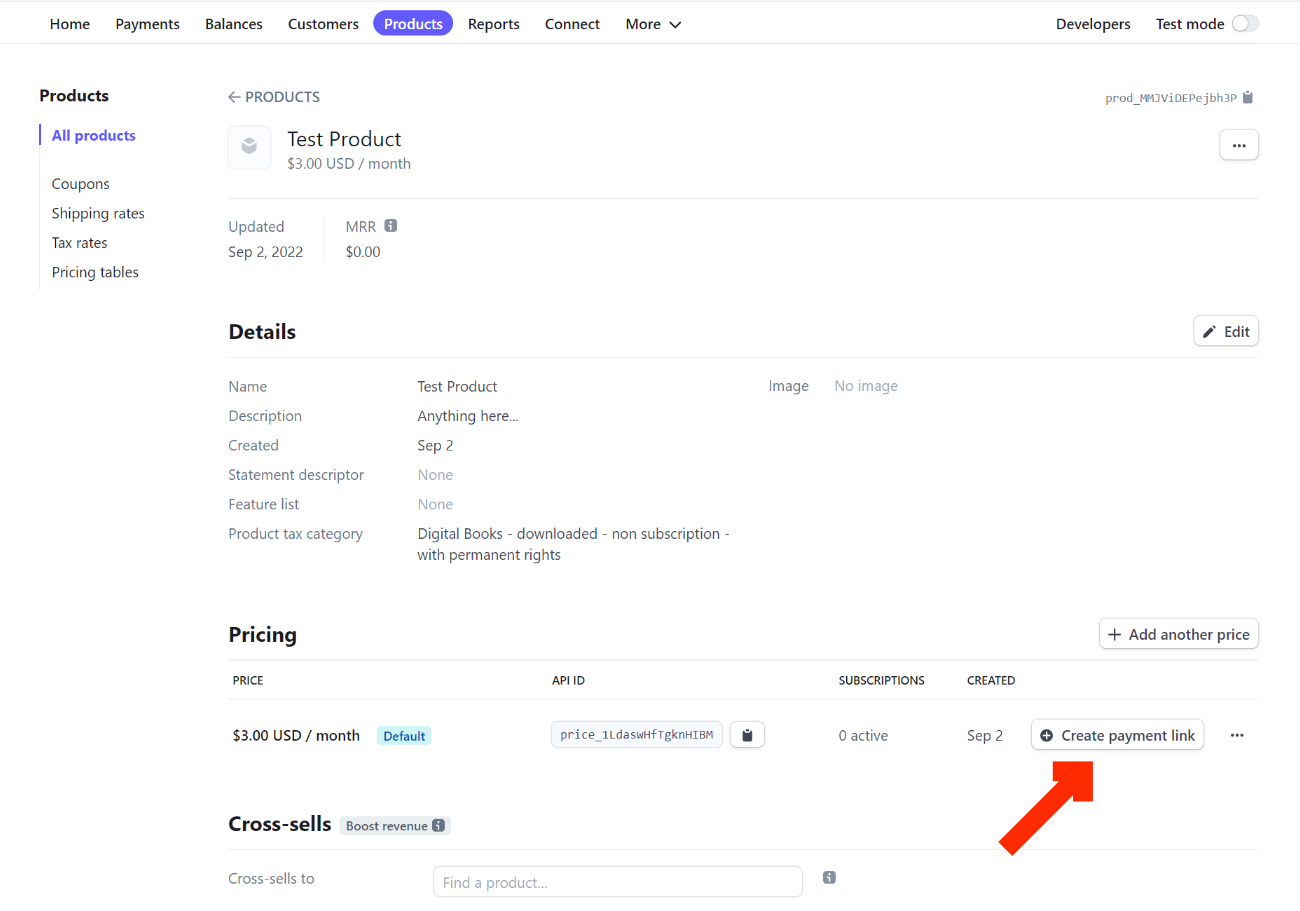
After that, the Stripe Product page is published as below:

To create a Stripe payment link, click the button as shown in the below image.
Here, you can customize the Stripe payment link and click next when you are done.

Next, we have options to split up the payment received from the recipient through Stripe connect. As for now, we want 100% of the amount deposited into our account. So, we uncheck the option and click the create link button.

After that, Stripe created a payment link page as shown below.

You can now receive the payment through the Stripe payment link. The Stripe Payment link preview in the browser as below:
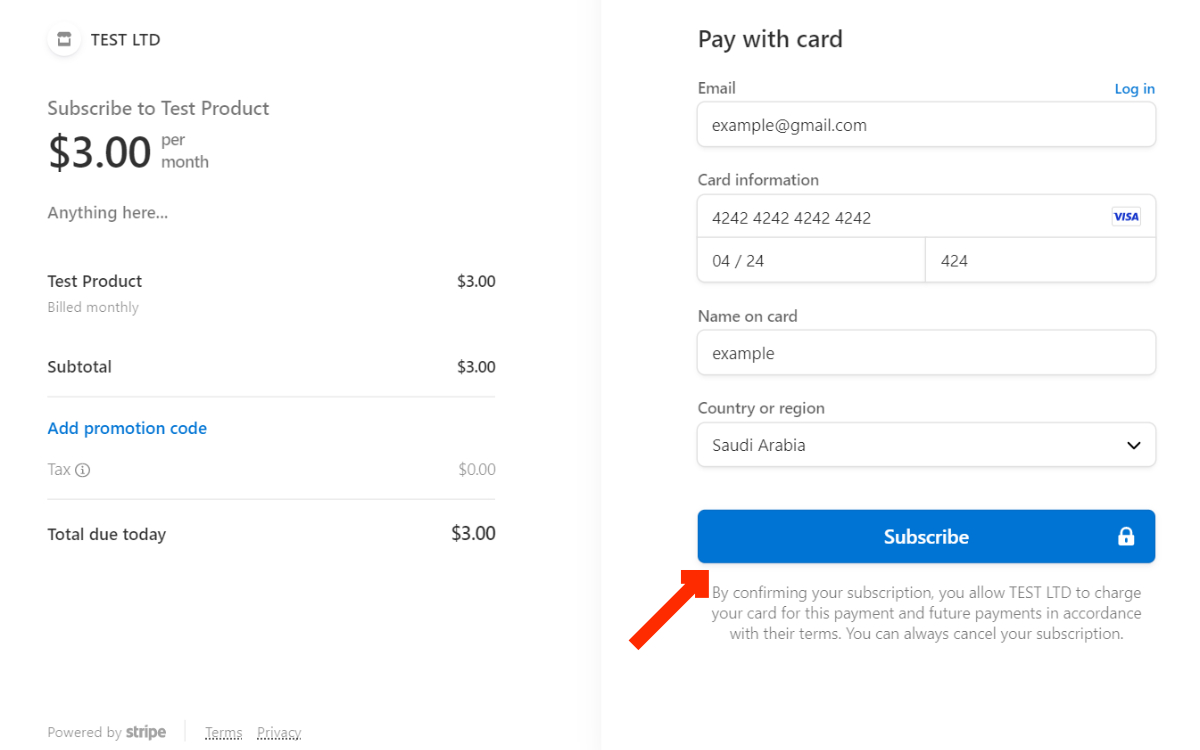
In the Stripe Payment Link, you can fill in your payment information and hit the subscribe button. If your payment is successfully received, then you'll receive a success message as below:

Stripe creates a customer id when the payment is successfully received. You can view the customer details by navigating to the below page in Stripe.

Great... We have finally been able to use the Stripe payment link to collect payment from the user.