Query Images in Gatsby
In this section, we learn how we can render the dynamic image from the markdown file in the blog post.
In the HTML, we can use the image below:
<img src="/img.png"
    alt="image title"
    loading="lazy" />
In the above HTML image code, we use loading="lazy" attribute to optimize the image as it only loads when the image scrolls into view of the browser.
But In Gatsby... there is a better way of loading an image that gives much more flexibility. For that, we can use gatsby-plugin-image in the project. The few benefits of using this plugin are mentioned below:
- Generate multiple smaller images so smartphones and tablets don’t download desktop-sized images.
- Strip all unnecessary metadata and optimize JPEG and PNG compression.
- Efficiently lazy load images to speed initial page load and save bandwidth.
- Use the “blur-up” technique or a ”traced placeholder” SVG to show a preview of the image while it loads.
- Hold the image position so your page doesn’t jump while images load.
To use the gatsby Image plugin in the project, we can download the npm package by executing the command in the bash terminal:
npm install gatsby-plugin-image gatsby-transformer-sharp gatsby-plugin-sharpIn the filesystem, we also need to create a blog post with the feature image. For example, we can create a blog post in the filesystem with the slug /table-on-webpage. For that, we can create a folder ("table-on-webpage") at the below location:
/content/blog/table-on-webpage
In the table-on-webpage folder, we can structure the files as below
📁 table-on-webpage
├── 📝 index.md
└── 📝 table.png
In the table-on-webpage/index.md, we can add the below metadata as described in the below image:

You can download the table.png file below:
After that, you can re-run the dev command by executing the below command in the terminal:
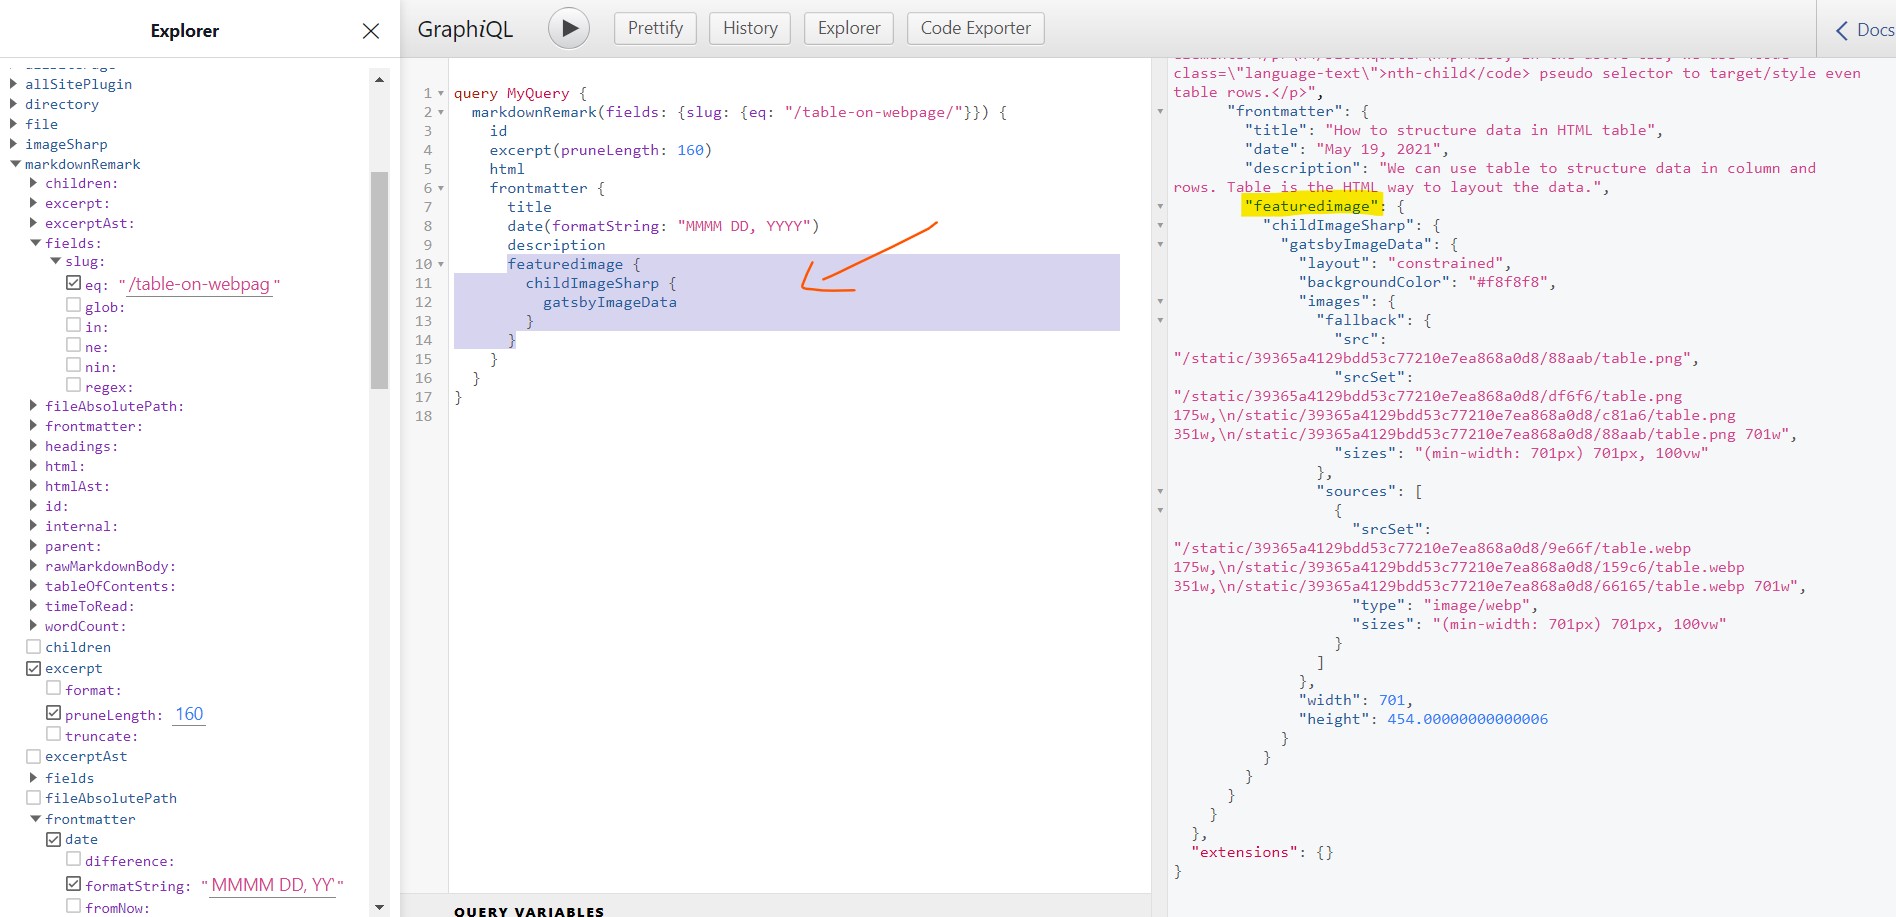
npm run developAfter that, Go to the GraphQL IDE in Gatsby, run the below query in the IDE to retrieve the blog post as below:

query MyQuery {
  markdownRemark(fields: {slug: {eq: "/table-on-webpage/"}}) {
    id
    excerpt(pruneLength: 160)
    html
    frontmatter {
      title
      date(formatString: "MMMM DD, YYYY")
      description
      featuredimage {
        childImageSharp {
          gatsbyImageData
        }
      }
    }
  }
}
We can use the above Graphql query to fetch the image in React component. For that, we can re-write the query in the src/templates/blog-post.js as below:
export const pageQuery = graphql`
  query BlogPostBySlug(
    $id: String!
    $previousPostId: String
    $nextPostId: String
  ) {
    markdownRemark(id: { eq: $id }) {
      id
      excerpt(pruneLength: 160)
      html
      frontmatter {
        title
        date(formatString: "MMMM DD, YYYY")
        description
        featuredimage {
          childImageSharp {
            gatsbyImageData
          }
        }
      }
    }
  }
`
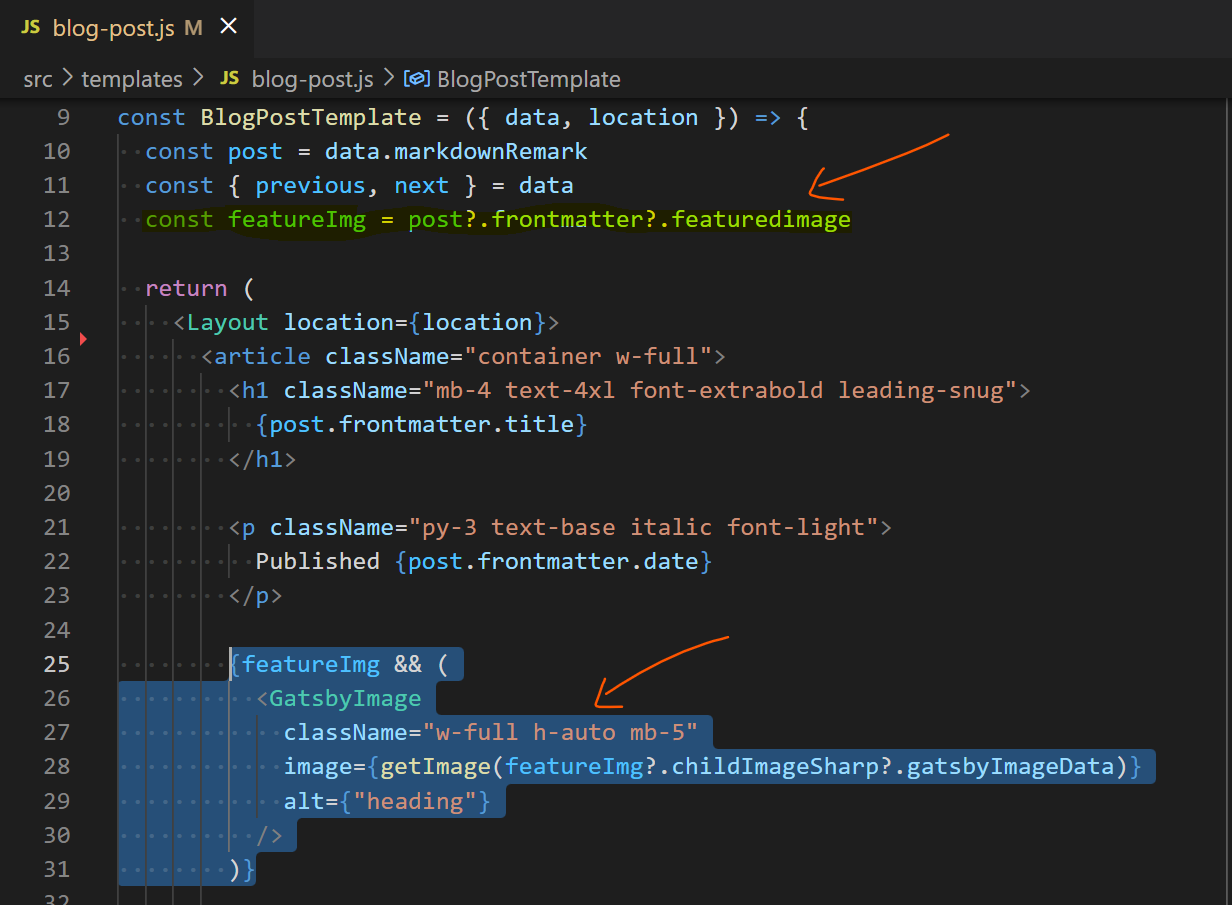
In the blog-post.js, we can update the code as below to use the Gatsby plugin image in the post:
import React from "react"

import { GatsbyImage, getImage } from "gatsby-plugin-image"
import Layout from "@components/layout"

const BlogPostTemplate = ({ data, location }) => {
  const post = data.markdownRemark
  const featureImg = post.frontmatter?.featuredimage?.childImageSharp?.gatsbyImageData

  return (
    <Layout location={location}>

      {featureImg && (
        <GatsbyImage
          className="w-full h-auto mb-5"
          image={getImage(featureImg)}
          alt={"heading"}
        />
      )}

    </Layout>
  )
}

export default BlogPostTemplate
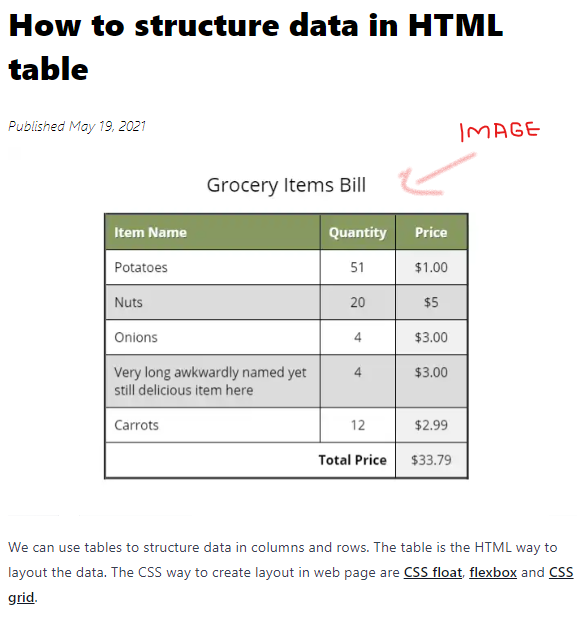
If we now visit the blog slug, we can view the image rendered in the browser.

In the next section, we'll create and publish a blog post with NetlifyCMS.