Login in the Dashboard
To access the dashboard, the user first needs to log in with the proper credential (e.g. email/password). For that, we can create a serverless function that validates the login credential and send the token as a response.
Create Login Serverless Function
We use the npm package, jsonwebtoken to sign a JWT. To install jsonwebtoken npm package, we can execute the below command in the terminal.
npm i jsonwebtoken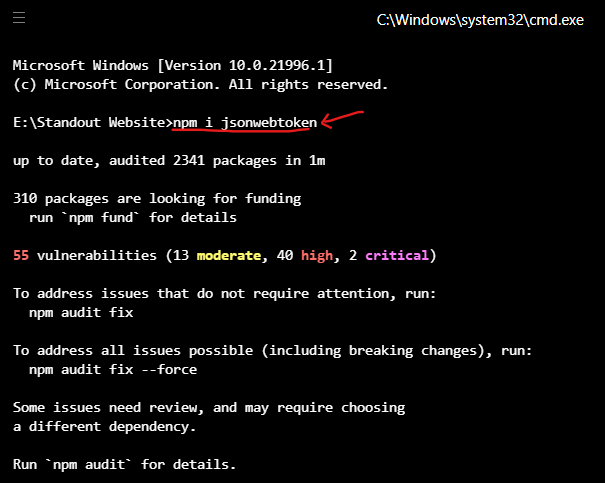
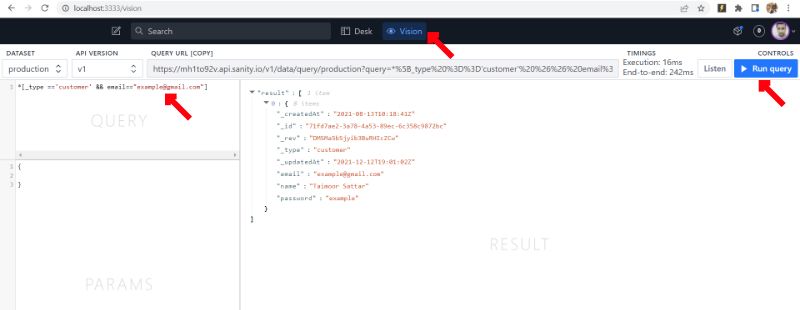
To query for the customer with their email, we can define the GROQ query in the Sanity Vision as below:
*[_type =='customer' && email=="example@example.com"]The response of the above GROQ query is as below:
We can use the above GROQ query in the serverless function. To get started, we can create a serverless function at the below location:
src/api/login.js
The above login serverless function create the API route at http://localhost:8000/api/login.
In the login.js, we can write the code as below:
import { querySanity } from "../lib/querySanity"
import jwt from "jsonwebtoken"

export default async function handler(req, res) {
  try {
    const email = req?.body?.email || req?.query?.email
    const password = req?.body?.password || req?.query?.password

    if (!email && !password) {
      return res.status(403).send("Missing data")
    } else {
      let cusData = await querySanity(`
        *[_type =='customer' && email=="${email}"]
      `)

      if (cusData[0].password === password) {
        var token = jwt.sign(
          {
            name: cusData[0].name,
            email: cusData[0].email,
            password: cusData[0].password,
          },
          String(process.env.jwt),
          { expiresIn: "7d" }
        )

        res.status(200).json({
          message: "success",
          token: token,
          email: cusData[0].email,
          name: cusData[0].name,
        })
      } else {
        throw {
          status: 500,
          message: "wrong Password",
        }
      }
    }
  } catch (error) {
    const status = error.response?.status || error.statusCode || 500
    const message = error.response?.data?.message || error.message

    res.status(status).json({
      message: error.expose ? message : `Faulty ${req.baseUrl}: ${message}`,
    })
  }
}
You can download login.js file below
Let's break down the above code to understand it better.
In the above serverless function, it accepts two payload data
emailpassword
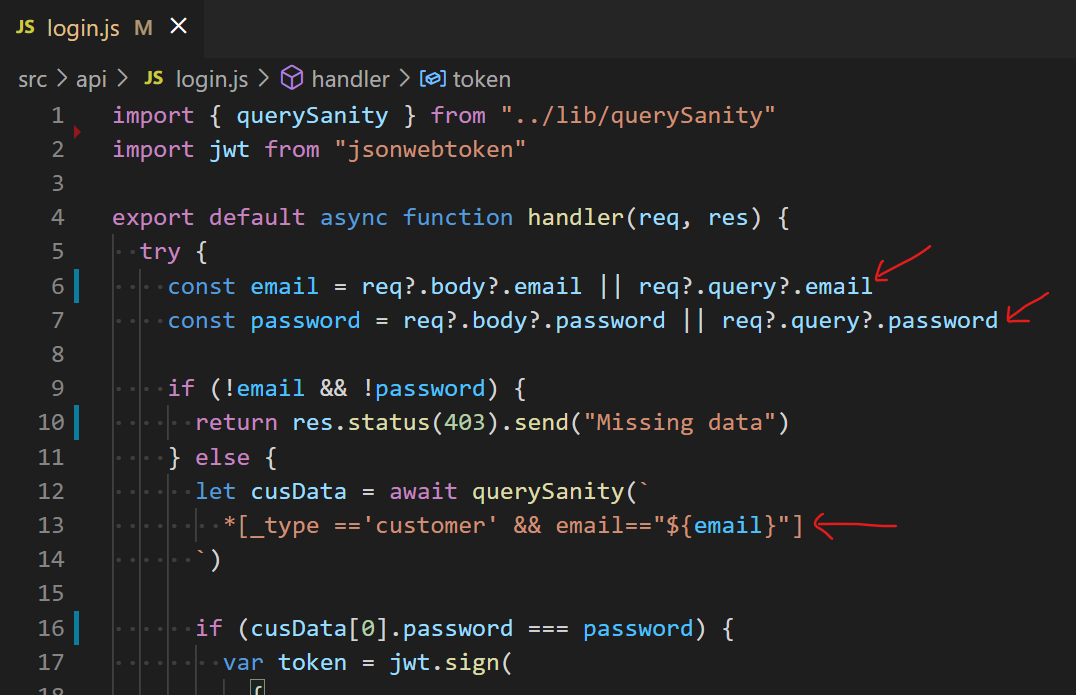
If the email and password exist in the request body, we can execute the GROQ query to get the customer data (use email as a reference).
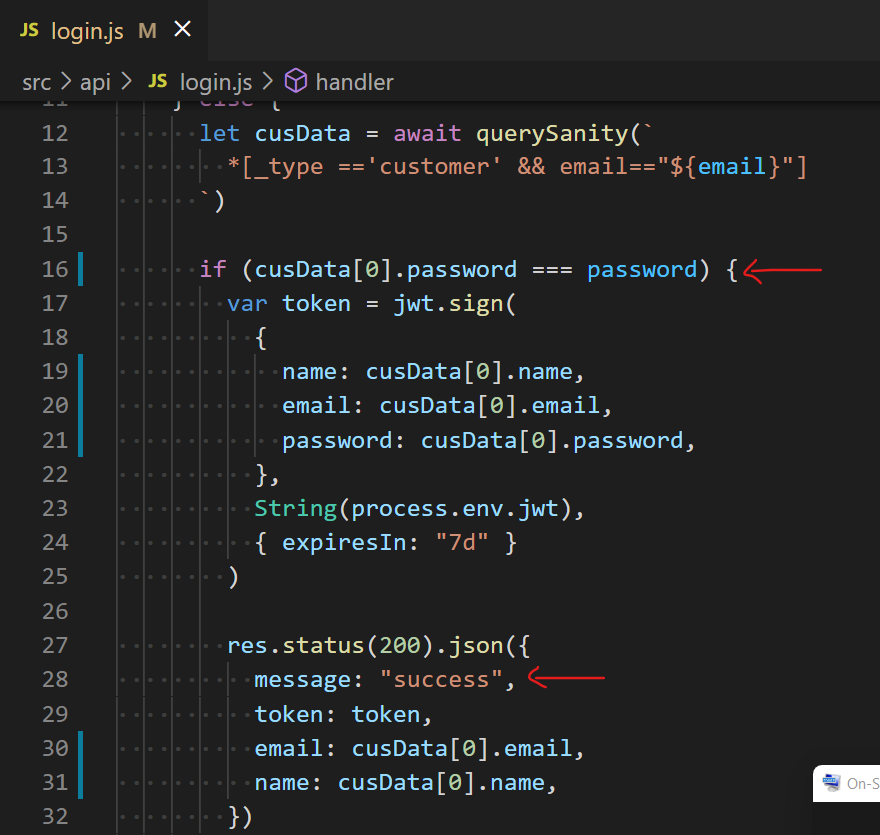
After that, we can compare the password of the customer. If the password is matched, then we can send the JWT token as a response.
Now, we need to test the serverless function in Postman. To test the serverless function, we can send the request in Postman as below:
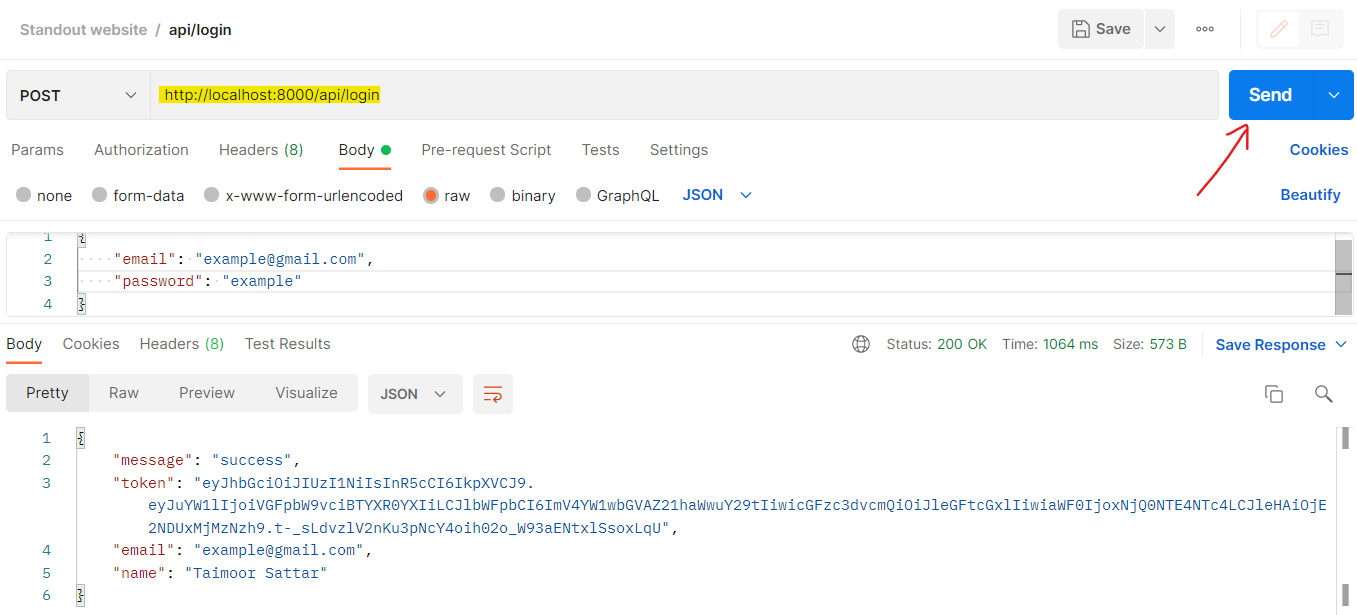
Great!! The login.js serverless function works fine.
Create a Login Route
Next, we need to create a login route so that users can interact with the page to login into the dashboard.
To create a login route in Gatsby, we can create the file at the below location:
src/pages/login.js
The above Page component create a route at http://localhost:8000/login.
In the login.js, we can write the code as below:
import React, { useEffect, useState } from "react"
import Layout from "@components/layout"
import Seo from "@components/seo"

import toast, { Toaster } from "react-hot-toast"

import { navigate } from "gatsby"
import { handleLogin, isLoggedIn, getCurrentUser } from "@utils/auth"

function encode(data) {
  return Object.keys(data)
    .map(key => `${encodeURIComponent(key)}=${encodeURIComponent(data[key])}`)
    .join("&")
}

export default function Login({ location }) {
  const [state, setState] = useState({})
  const [disable, setDisable] = useState(false)

  const handleChange = e => {
    setState({ ...state, [e.target.name]: e.target.value })
  }

  const handleSubmit = async e => {
    e.preventDefault()
    setDisable(true)
    try {
      let auth = await handleLogin({
        email: state.email,
        password: state.password,
      })

      if (auth) {
        toast.success("Welcome 🎉")
        navigate("/modules/")
      } else {
        toast.success("Wrong entry.", {
          icon: "⚠️",
        })
      }

      setDisable(false)
    } catch (e) {
      setDisable(false)
      toast.error("Something went wrong.")
    }
  }

  useEffect(() => {
    if (isLoggedIn()) {
      navigate("/modules/")
    }
  }, [])

  return (
    <Layout location={location}>
      <Seo title="Login" location={location} description="Login." />
      <Toaster position="top-center" />
      <div className="flex items-center justify-center min-h-full px-4 py-12 sm:px-6 lg:px-8">
        <div className="w-full max-w-md space-y-8">
          <h2 className="mt-6 text-3xl font-extrabold text-center text-gray-900">
            Sign in to your account
          </h2>
          <form
            name="login"
            onSubmit={e => handleSubmit(e)}
            className="mt-8 space-y-6"
            action="#"
            method="POST"
          >
            <input type="hidden" name="remember" value="true" />
            <div className="-space-y-px rounded-md shadow-sm">
              <div>
                <label htmlFor="email-address" className="sr-only">
                  Email address
                </label>
                <input
                  id="email-address"
                  name="email"
                  type="email"
                  autocomplete="email"
                  required
                  className="relative block w-full px-3 py-2 text-gray-900 placeholder-gray-500 border border-gray-300 rounded-none appearance-none rounded-t-md focus:outline-none focus:ring-indigo-500 focus:border-indigo-500 focus:z-10 sm:text-sm"
                  placeholder="Email address"
                  onChange={handleChange}
                />
              </div>
              <div>
                <label htmlFor="password" className="sr-only">
                  Password
                </label>
                <input
                  id="password"
                  name="password"
                  type="password"
                  autocomplete="current-password"
                  required
                  className="relative block w-full px-3 py-2 text-gray-900 placeholder-gray-500 border border-gray-300 rounded-none appearance-none rounded-b-md focus:outline-none focus:ring-indigo-500 focus:border-indigo-500 focus:z-10 sm:text-sm"
                  placeholder="Password"
                  onChange={handleChange}
                />
              </div>
            </div>

            <div>
              <button
                type="submit"
                className="relative flex justify-center w-full px-4 py-2 text-sm font-medium text-white bg-indigo-600 border border-transparent rounded-md cursor-pointer group hover:bg-indigo-700 focus:outline-none focus:ring-2 focus:ring-offset-2 focus:ring-indigo-500 disabled:bg-gray-50 disabled:text-gray-500 disabled:border-gray-200 disabled:shadow-none disabled:pointer-events-none"
                disabled={disable ? true : false}
              >
                <span className="absolute inset-y-0 left-0 flex items-center pl-3">
                  <svg
                    className="w-5 h-5 text-indigo-500 group-hover:text-indigo-400"
                    xmlns="http://www.w3.org/2000/svg"
                    viewBox="0 0 20 20"
                    fill="currentColor"
                    aria-hidden="true"
                  >
                    <path
                      fill-rule="evenodd"
                      d="M5 9V7a5 5 0 0110 0v2a2 2 0 012 2v5a2 2 0 01-2 2H5a2 2 0 01-2-2v-5a2 2 0 012-2zm8-2v2H7V7a3 3 0 016 0z"
                      clipRule="evenodd"
                    />
                  </svg>
                </span>
                Sign in
              </button>
            </div>
          </form>
        </div>
      </div>
    </Layout>
  )
}
You can download pages/login.js file from below:
The above code renders in the browser as below.
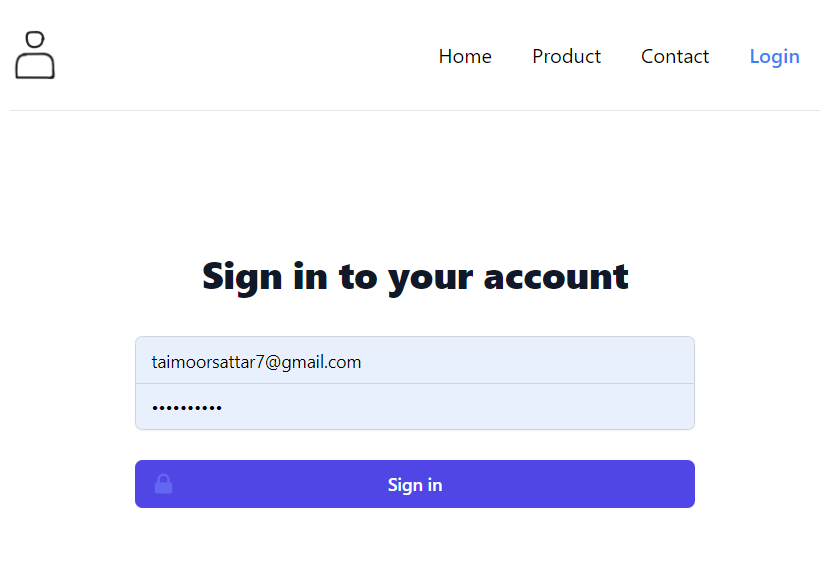
We use Tailwind CSS utility classes to style the login form. To visualize it you can view the below Gif.
In the Login Page component, the input is bound to React state. If the input value is changed, the React state is updated. In our case, we have two inputs e.g. email and password input. Whenever the input is changed, handleChange function is executed.
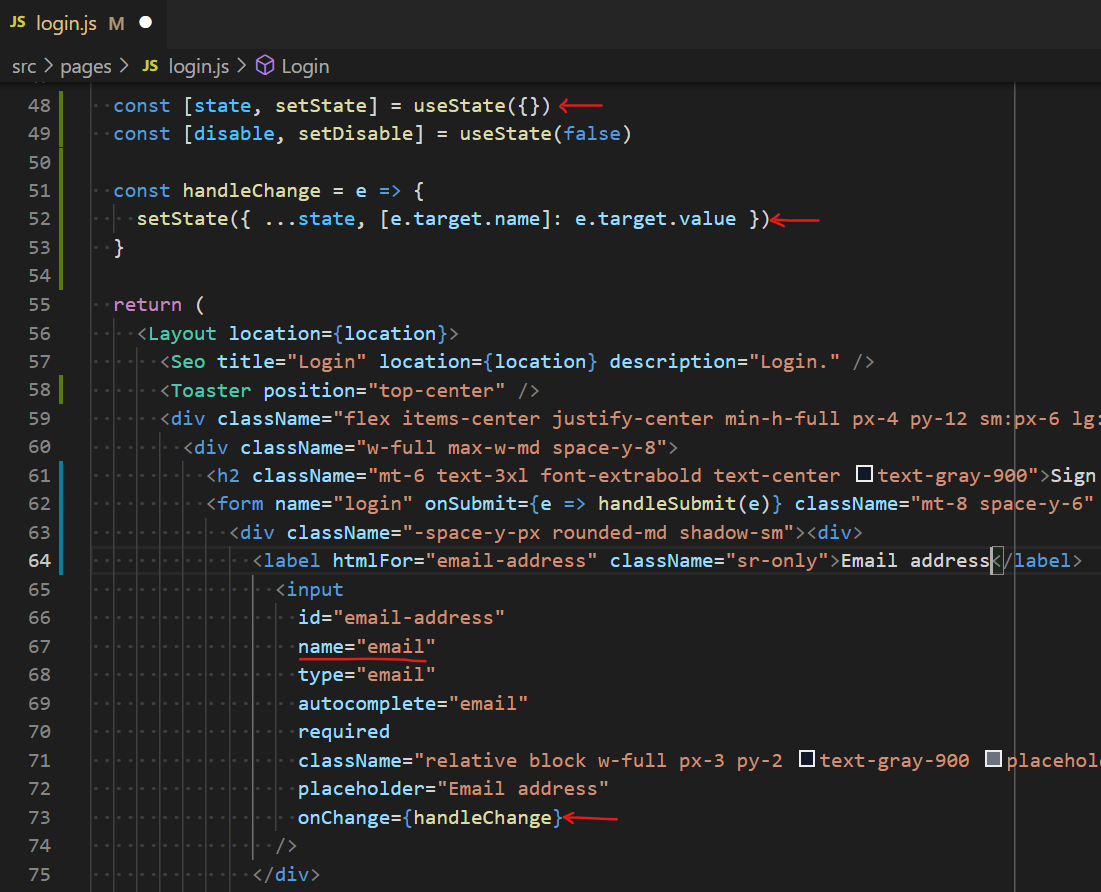
In the below Gif, you can visualize how the React state is changed with the change of Input.
When the form is submitted, we can execute handleSubmit function. If the login credentials are valid, we need to store the JWT token in the browser local storage. For that, we can add code in the below file location:
src/utils/auth.js
In the auth.js, we can write the code as below:
const setUser = user => (window.localStorage.gatsbyUser = JSON.stringify(user))

export const handleLogin = async ({ email, password = "" }) => {
  if (!isBrowser) return false

  let { data } = await Axios.post(`/api/login`, {
    email: email,
    password: password,
  })

  if (data.message === "success") {
    return setUser({
      name: data.name,
      email: data.email,
      avatar: get_gravatar_image_url(data.email, 120, "mm", "g", "y"),
      token: data.token,
    })
  }

  return false
}
The above function is called in the handleSubmit function as shown in the image below

If the login is successfully complete, we can notify the user. For that, we can use the npm package, react-hot-toast. You can visit the official page at the below link:
To download react-hot-toast, we can execute the below command in the terminal:
npm i react-hot-toast
At last, we need to interact with the login page to check if the login behavior works fine.
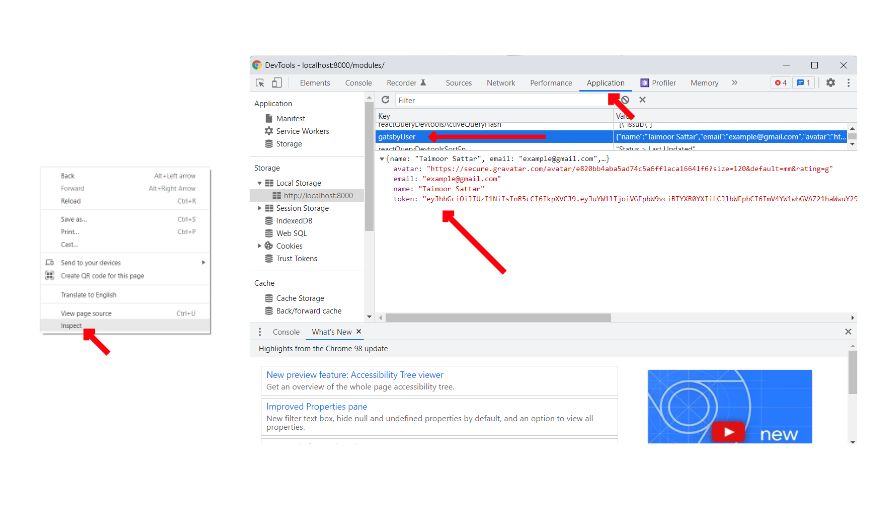
If the login is successfully complete, we store the JWT token in the browser local storage. For that, we can navigate as shown in the below image.
Great🎉 Our login page is now completed.