SEO React Component
SEO is an organic way of getting traffic from search engines. Search engines like Google crawl a website and collect information to rank it on their search engine. Search engines use metatags to determine information about the website.
We can add the meta tags inside the <body> as below:
<!-- Primary Meta Tags -->
<title>This is the title page</title>
<meta name="title" content="This is the title page">
<meta name="description" content="Description of the page.">

<!-- Open Graph / Facebook -->
<meta property="og:type" content="website">
<meta property="og:url" content="https://metatags.io/">
<meta property="og:title" content="Meta Tags — Preview, Edit and Generate">
<meta property="og:description" content="With Meta Tags you can edit and experiment with your content then preview how your webpage will look on Google, Facebook, Twitter and more!">
<meta property="og:image" content="https://metatags.io/assets/meta-tags-16a33a6a8531e519cc0936fbba0ad904e52d35f34a46c97a2c9f6f7dd7d336f2.png">

<!-- Twitter -->
<meta property="twitter:card" content="summary_large_image">
<meta property="twitter:url" content="https://metatags.io/">
<meta property="twitter:title" content="Meta Tags — Preview, Edit and Generate">
<meta property="twitter:description" content="With Meta Tags you can edit and experiment with your content then preview how your webpage will look on Google, Facebook, Twitter and more!">
<meta property="twitter:image" content="https://metatags.io/assets/meta-tags-16a33a6a8531e519cc0936fbba0ad904e52d35f34a46c97a2c9f6f7dd7d336f2.png">
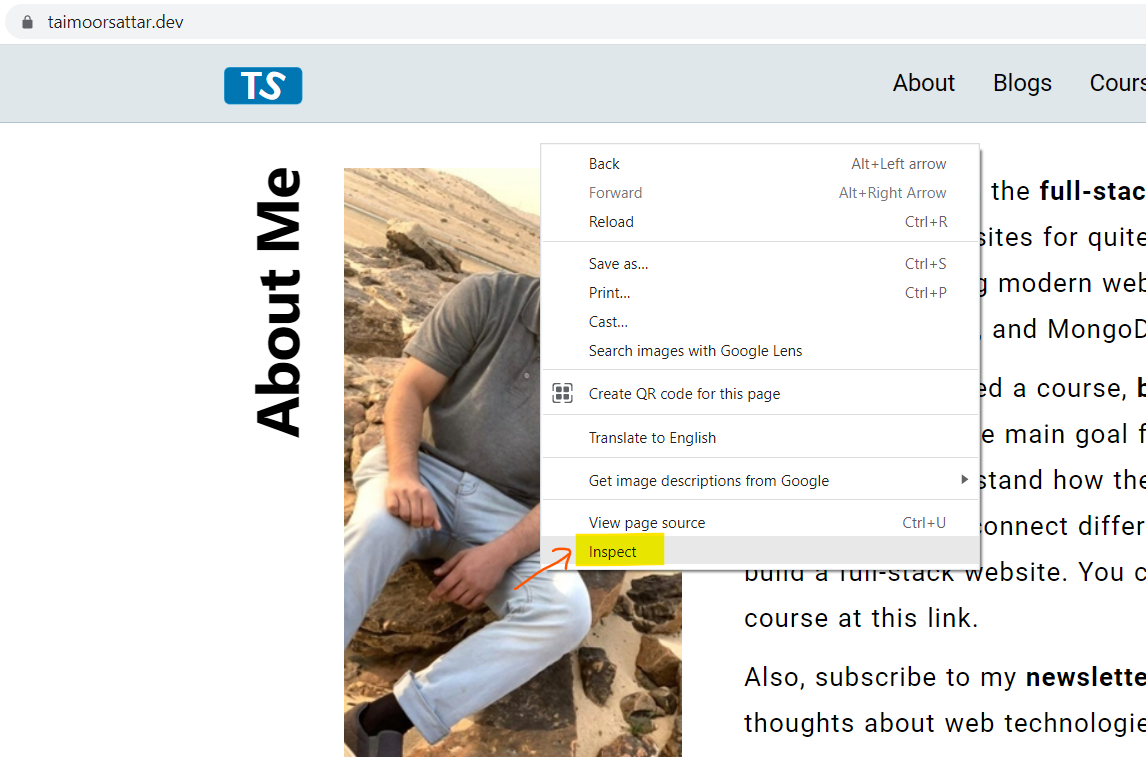
To view the metatags for the specific website, you can right-click and navigate to inspect option as shown below:
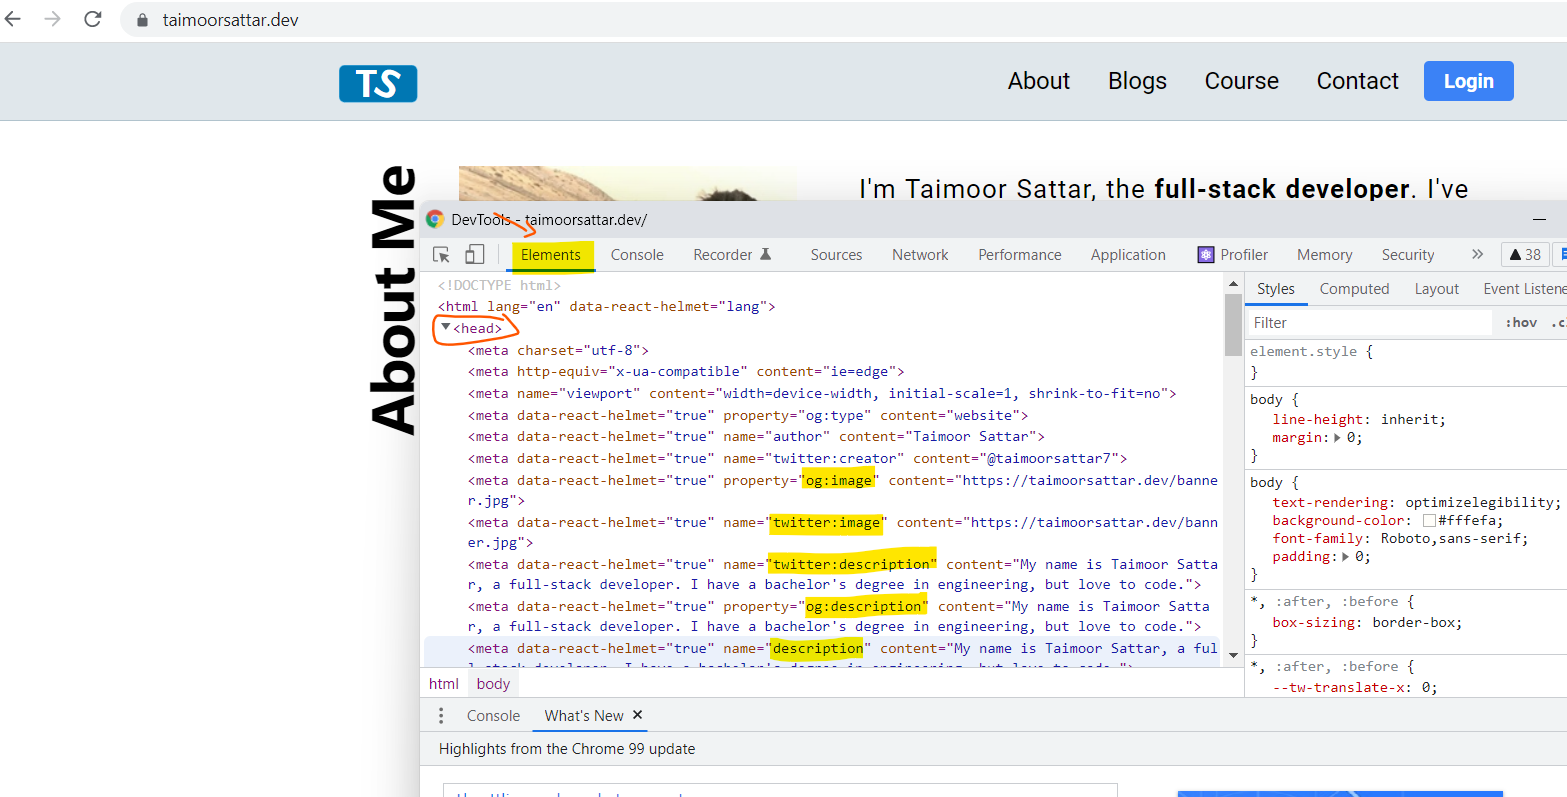
In the inspect tool, we can view the SEO metatags in the head document as shown below.
Another way to check the SEO metatags is to use a website tool e.g. metatags.io as shown below:
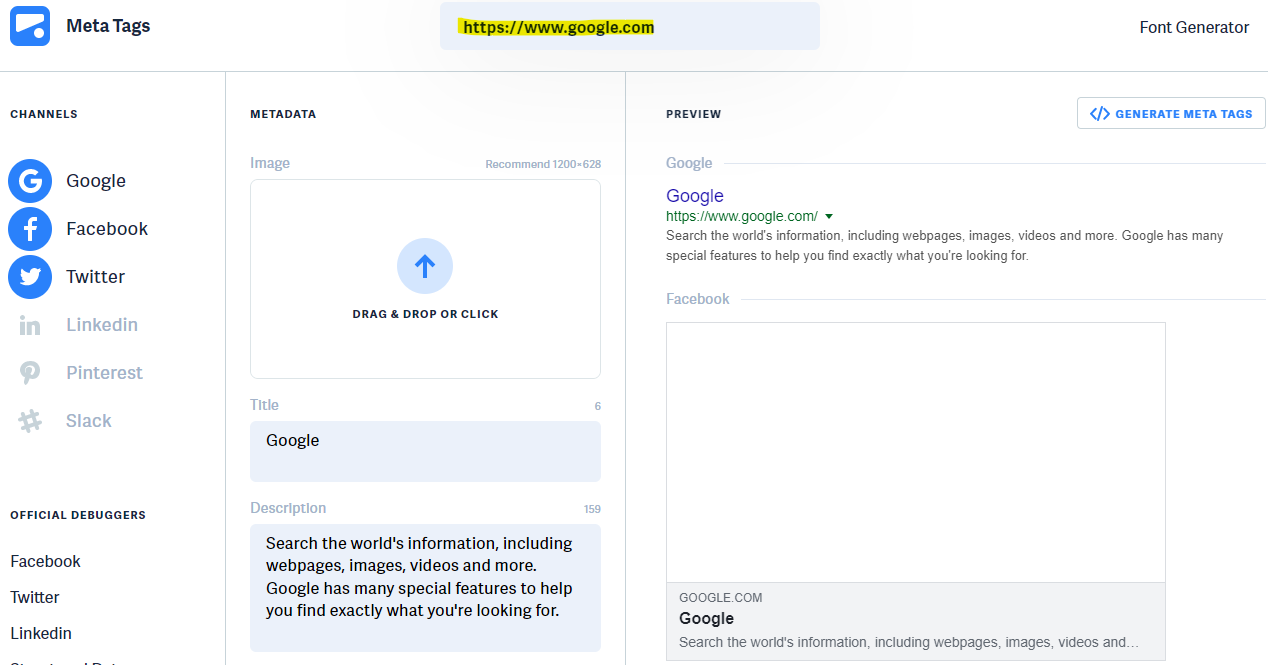
As in the above image, we can write the website name in the input bar and press Enter. As a result, we can retrieve the SEO metatags for a specific website.
The proper SEO Metatags do not guarantee a top spot in search engine results for the specific keyword. The search engine e.g. Google crawls more than 200 factors to decide on page ranking but... In the end, it boils down to two main factors for page ranking.
- Write good content
- Be consistent
Add SEO metatag on Page route
In order to add the SEO metatags to the head document, we need to install an NPM package called react-helmet. To install react-helmet we can execute the below command in the terminal:
npm i react-helmet
react-helmet is the npm package that is used to add the tags in the <head> document.To add the metatags, we can create an SEO component. In the SEO component, we need the information for the page URL (location). We can get the value of the location data from the props of the page component.
For example, we can pass the location props value from the Page components to the SEO component as shown in the below image.
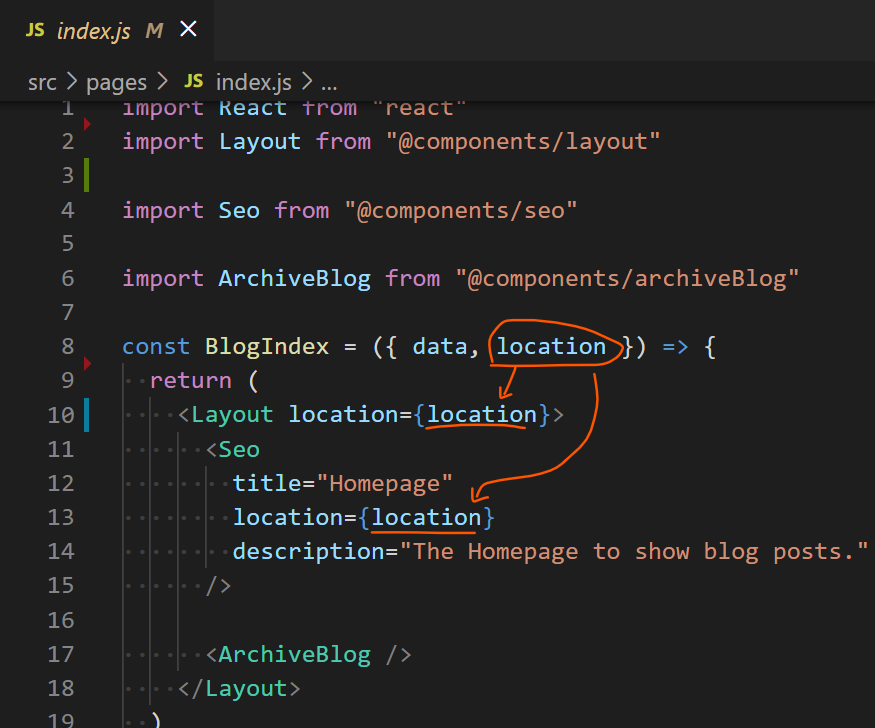
We have not yet defined the SEO component. But in the above image, we show you how we are going to use the SEO component.
To create the Seo React Component, we can create a file at the below location:
src/components/seo.js
src
└── components
		└── seo.js
In the seo.js, we can write the code as below:
import React from "react"
import { Helmet } from "react-helmet"

const Seo = ({ location, description, title, image }) => {
  return (
    <>
      <Helmet>
        <title>{title}</title>
        <meta name="title" content={title} />
        <meta name="description" content={description} />
        <link rel="canonical" href={location.href} />

        {/* Social: Twitter  */}
        {/* After inserting META need to validate at https://dev.twitter.com/docs/cards/validation/validator  */}
        <meta name="twitter:card" content="summary_large_image" />
        <meta name="twitter:title" content={title} />
        <meta name="twitter:description" content={description} />
        {image && <meta name="twitter:image" content={image} />}

        <meta name="twitter:url" content={location.href} />

        {/* Open Graph */}
        <meta property="og:url" content={location.href} />
        <meta property="og:type" content="website" />
        <meta property="og:title" content={title} />
        {image && <meta property="og:image" content={image} />}

        <meta property="og:description" content={description} />
      </Helmet>
    </>
  )
}

export default Seo
In the above code, we enclose the SEO metatags inside of the<Helmet>tag. By enclosing the SEO metatags in the<Helmet>tag, we can insert the SEO metatags in the document head.
In the above Seo component, we require the below information in the React props to fill the SEO data:
title, description, location, image
The above information is passed by the Page route component to the Seo component as described in the below image.

We can import the Seo component into the page component and pass the Seo meta information as the props. For each page route, we need to define the Seo metatag in the <head> document. Page components are responsible for the route in Gatsby. There are two possible routes in Gatsby:
- Static Route
- Dynamic Route
In the Static route, a single page component creates a single route in Gatsby. For example, the page component of the Hompage is located at the below location.
src/pages/index.js
To add Seo metadata to the homepage, we can write the code in the index.js as below:
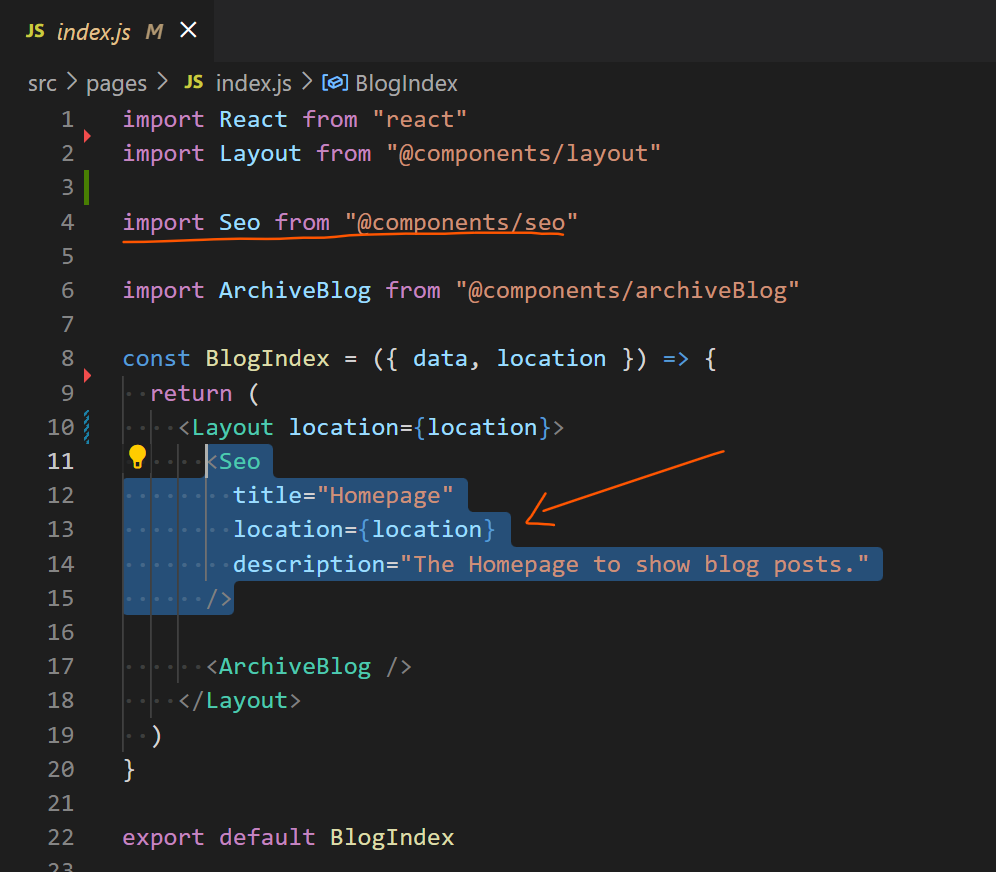
In the page component, the location props key is passed in the props that contain the page route information of the Homepage.
If we now visit the browser and we can view the SEO metatag in the inspect option.
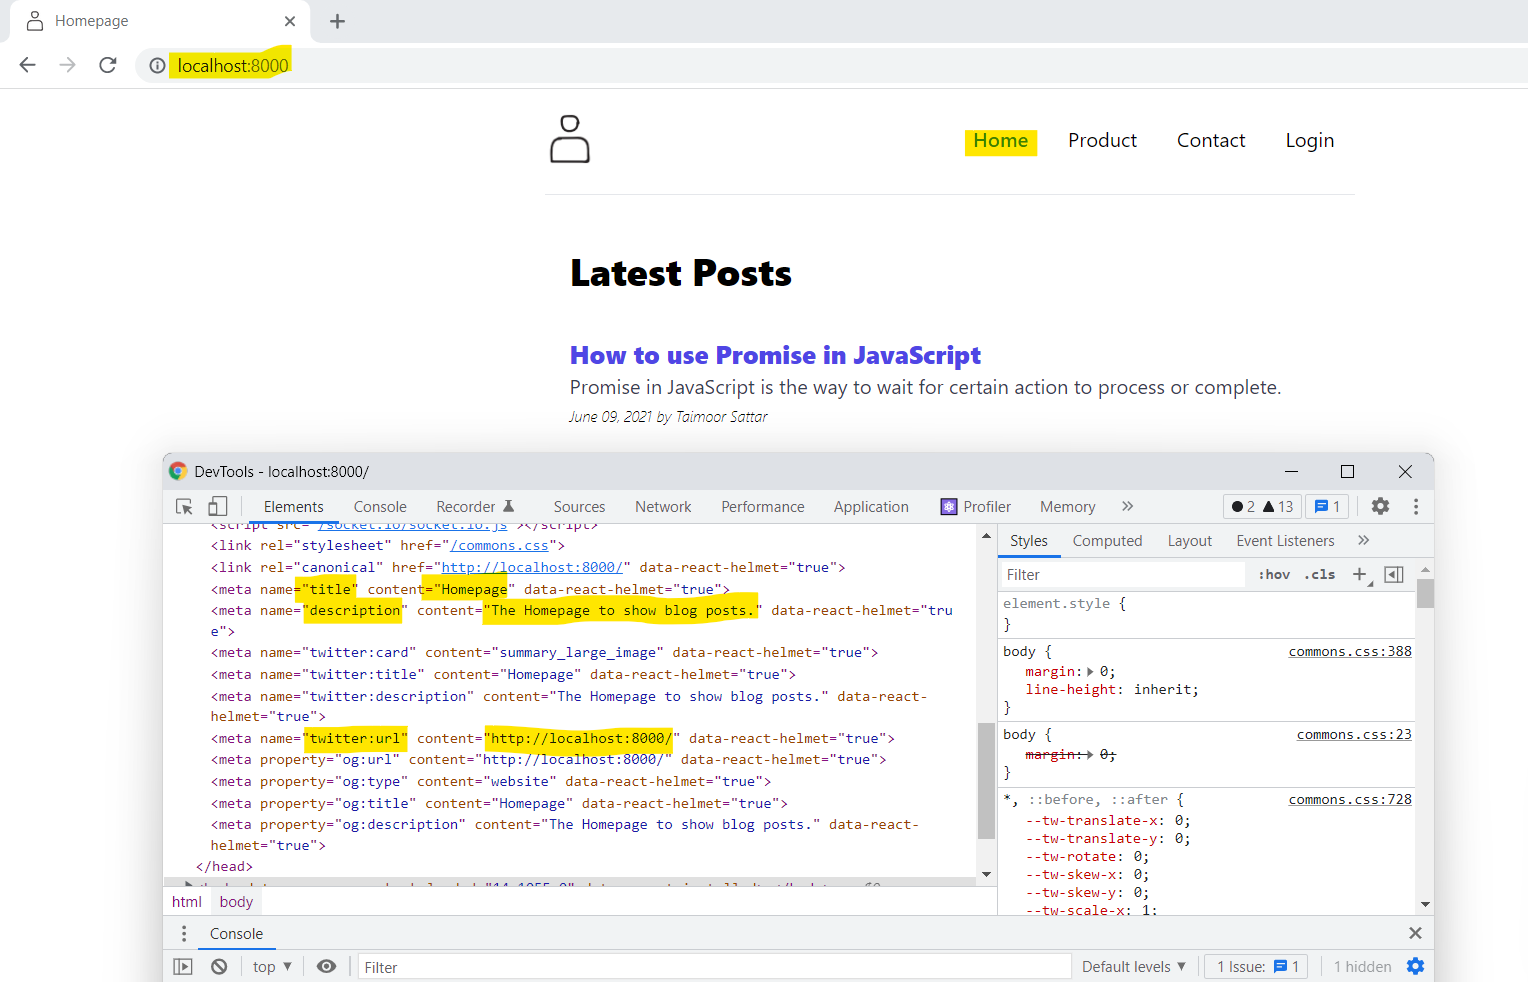
While on another hand, the example of a dynamic route is the Blog Post, for each blog post we create a separate slug. For the Blog Post route, we have created the file at the below location.
src/templates/blog-post.js
In the blog-post.js, we can write the code as below:
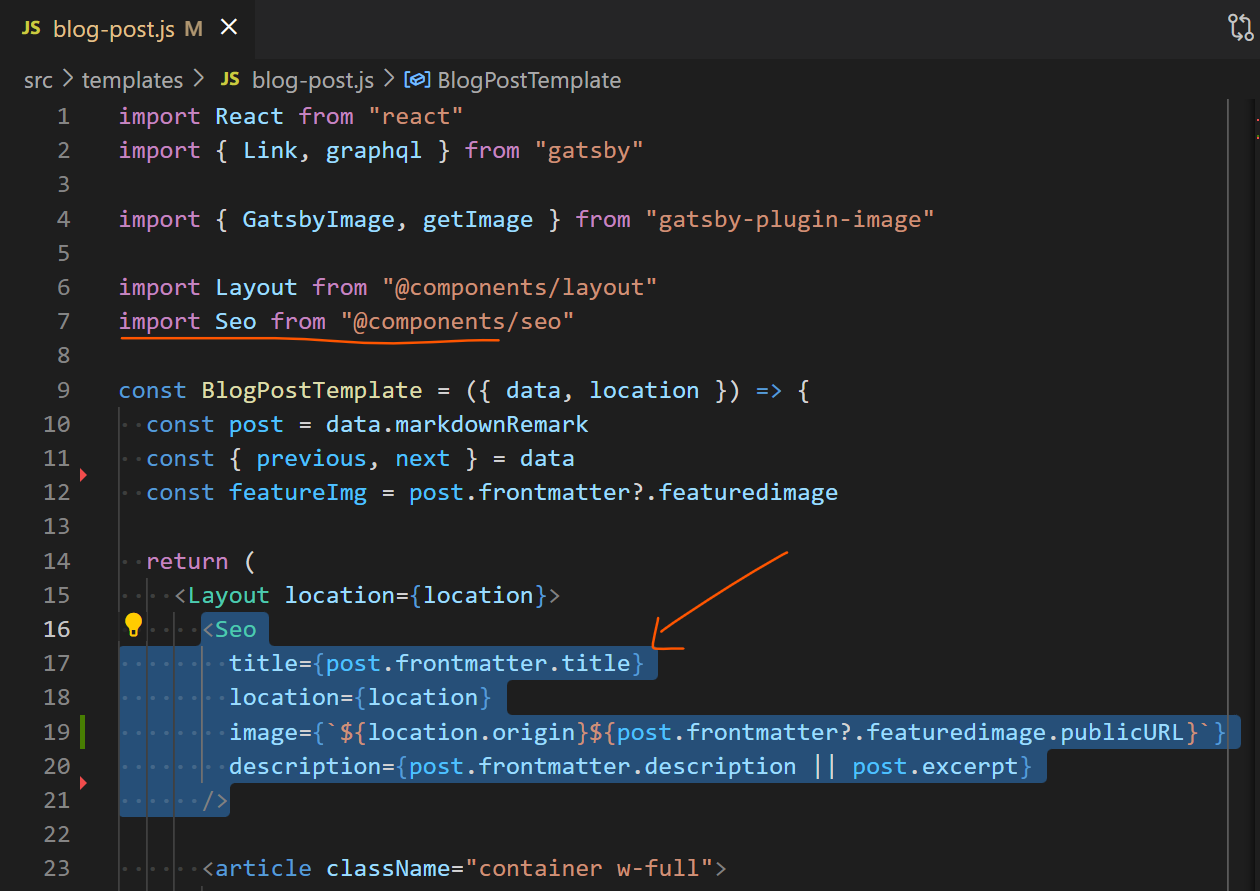
Now, Visit the browser, navigate to the blog post and go to the inspect tool option.

As shown in the above image, we can see the SEO metatags in the head document.