Create An Image Slider Using Javascript


In this section, we learn how to create an image slider using javascript. We are adding functionality to this image slider by adding a left/right arrow to slide the image in the respective direction.
You can preview the image slider (Javascript) code for this section at the below codepen link:
To get started, we can write the below code in HTML.
<div class="wrapper">
 <h2>Image Slider (Javascript)</h2>
 <div class="slider">
 <img src="https://i.picsum.photos/id/694/500/500.jpg?hmac=cEe2DO9tVxp0o0HjSI5RboKc75ofkq50NvKBIlB_0fQ" alt="Strawberry" />

 <img src="https://i.picsum.photos/id/531/500/500.jpg?hmac=eaduedF4dw0jS6AeDrrxNJIxAlsmWfdZWEPdEG84WRw" alt="Dock" />

 <!-- ++ more Images Here  -->

</div>
  <span class="flex items-center justify-center control-slider btn-left">
  <b>←</b>
  </span>
  <span class="flex items-center justify-center control-slider btn-right">
  <b>→</b>
  </span>
</div>
To add styling to the HTML, we can write the below code in CSS.
.wrapper{
 margin: auto;
 max-width: 960px;
 position: relative;
}

.slider{
 width: 100%;

 transition: all 0.5s linear;
 overflow-x:scroll;
 white-space: nowrap;
}

.slider img{
 display: inline-block;
 height: 200px
}
For the left/right arrow, we can use CSS position to place the arrow at the respective position.
.control-slider {
 cursor: pointer;
 position: absolute;
 z-index: 5;
 top: 50%;
 border-radius: 50%;
 height: 40px;
 width: 40px;
 background-color: #fff;
 line-height: 40px;
 color: #333;
 box-shadow: 0 2px 5px rgba(0, 0, 0, 0.25);
 user-select: none;
}

.btn-left {
 text-align: center;
 left: 10px;
}

.btn-right {
 text-align: center;
 right: 10px;
}
To customize the scrollbar of image slider, we can write the below code in CSS
::-webkit-scrollbar {
height: 5px;
width: 10px;
border-radius: 5px;
}
/* Track */
::-webkit-scrollbar-track {
background: #f1f1f1;
border-radius: 5px;
}
/* Handle */
::-webkit-scrollbar-thumb {
background: #888;
border-radius: 5px;
}
/* Handle on hover */
::-webkit-scrollbar-thumb:hover {
background: #555;
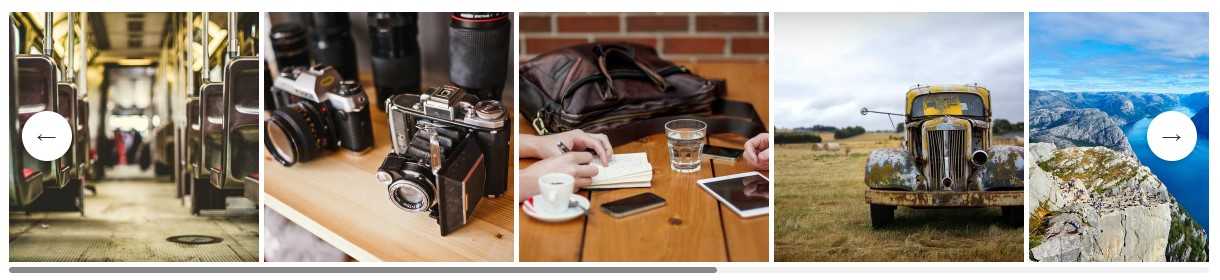
}The image slider preview in the browser as below:
In Javascript, we can add functionality when the left/right arrow is clicked the images slide in the respective direction. We can query the arrow element from the dom using Javascript.
In Javascript, we can write the below code:
const sliderElm = document.querySelector(".slider");

const btnLeft = document.querySelector(".btn-left");
const btnRight = document.querySelector(".btn-right");

const numberSliderBoxs = sliderElm.children.length;
const widthSliderBoxs = sliderElm.children[0].clientWidth
let totalsize = numberSliderBoxs * widthSliderBoxs;

function moveLeft() {
  sliderElm.scrollBy({
 top: 0,
 left: -widthSliderBoxs,
 behavior : "smooth"
  })
}

function moveRight() {
  sliderElm.scrollBy({
 top: 0,
 left: widthSliderBoxs,
 behavior : "smooth"
  })
}

// Event Listeners:
btnLeft.addEventListener("click", moveLeft);
btnRight.addEventListener("click", moveRight);
In the above code, we add an event listener to the arrow element so that when clicked, we execute the moveLeft() and moveRight() function to slide the images in the respective direction.
Finally, the image slider code preview in the browser is as below.
